AI by Zapier is a built-in tool that lets you add AI-powered steps to your Zaps, powered by popular AI models. You can use a built-in connection or connect your own AI provider account.
Available on plans:
Free
Professional
Team
Enterprise
Overview
An AI by Zapier step has two main panels:
- Configure: write your prompt, select a model, and configure settings (output fields, tools and knowledge, and advanced options).
- Preview: test your step and review the output before finishing.
Supported AI providers
You can only use models that your account admins or owner have allowed or have not restricted. Learn more about managing access to apps.
1. Add an AI by Zapier step
- In your Zap, click the + icon to add an action step.
- In the search box, search for and select AI by Zapier. The step will open in the Zap editor.
2. Select a model
- In the Prompt field, click the model dropdown at the bottom right of the prompt area to open the tier and model selector.
-
Select a model tier:
- Standard (1x tasks): Best for high volume, simple tasks. Tools are not available on this tier.
- Advanced (3x tasks): Stronger reasoning for complex prompts and tool usage. This is the default selection for new steps.
- Premium (5x tasks): Complex analysis, tool usage, and multi-step reasoning.
- Bring Your Own Key (1x tasks): Use your own AI provider account with a 1x task rate, including tool calls. Learn how to connect your own AI provider.
- Select a specific model within your chosen tier. The Auto option uses the default model for your selected tier.
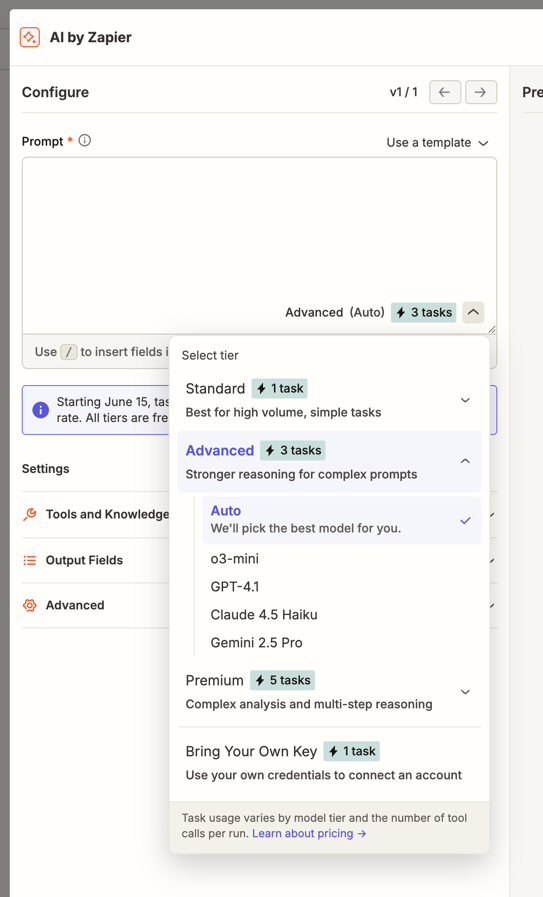
Standard model steps use 1 task per run. If you select Advanced (3x) or Premium (5x), your step uses tasks at that tier's rate per run. If your step uses a tool, each call incurs an extra cost. Learn more about AI by Zapier model tier pricing.
Connect your own AI provider
If you select Bring Your Own Key as your model tier, a dialog opens so you can connect your own AI account.
- In the Provider dropdown, select your AI provider (OpenAI, Anthropic, Google, Azure OpenAI, or Amazon Bedrock).
- Under Account, select an existing connected account or click + Connect a new account. A new browser tab will open where you can enter your API credentials.
- In the Model dropdown, select the model you want to use.
- Click Connect.
3. Write your prompt
-
In the Prompt field, enter a description of what you want the step to do.
- Type
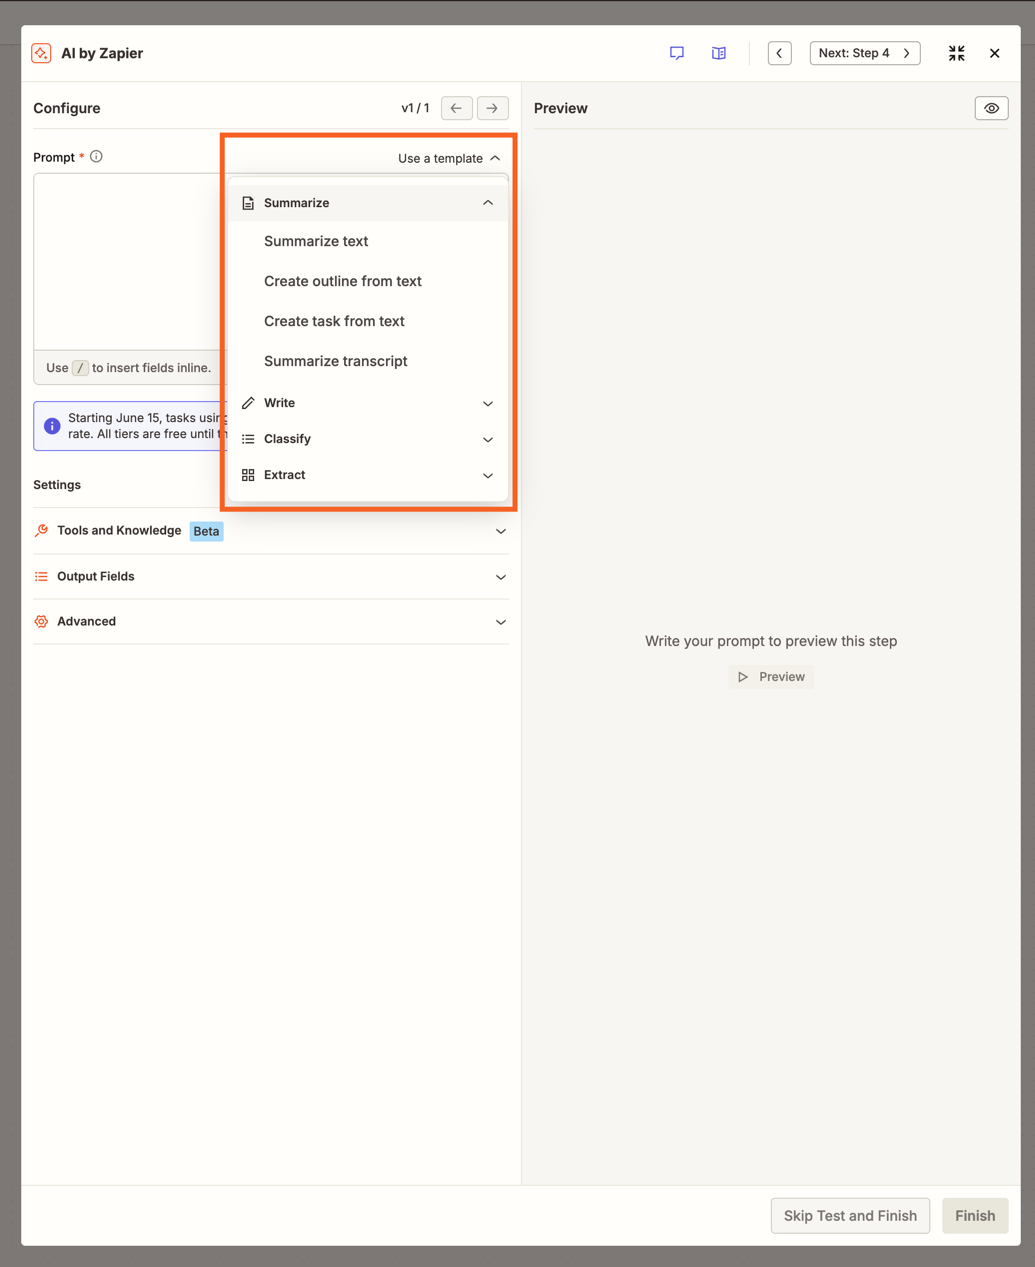
/to insert a field from a previous Zap step inline in your prompt. Learn how to map fields from previous steps. - (Optional) Click Use a template at the top right of the Prompt field to use a pre-built prompt. Select a category (Summarize, Write, Classify, or Extract) and then select a template. The Prompt field will be filled with instructions you can edit.
- Type
- Learn how to write an effective AI prompt.
- As you edit prompts, you can review previous versions using the version arrows at the top of the Configure panel. Prompt versions are only saved within a session. Only the current version is saved after you close the Zap editor.
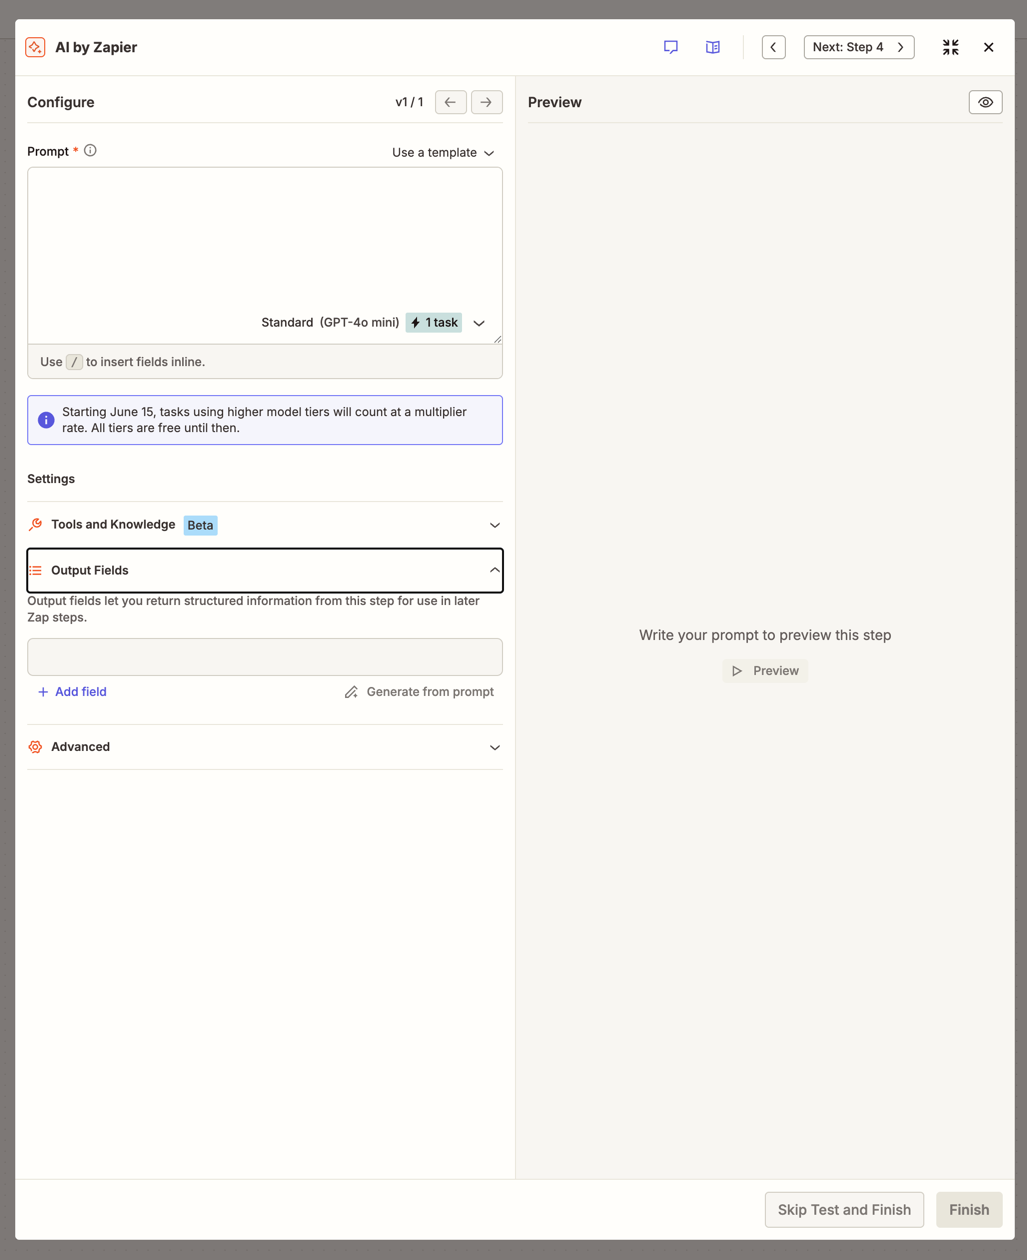
Output fields
Under Settings, click Output Fields to expand the section and define the data this step should return. You can map output fields to subsequent steps in your Zap.
- Click + Add field. A dialog will open.
- In the Field name field, enter a name for your output field.
- In the Field type field, select a type.
- (Optional) In the Field description field, enter text or map a field from a previous step.
- (Optional) Check Is this output field required? if the field must always be returned.
- Click Save. Repeat to add more output fields.
(Optional) Click Generate from prompt to have AI by Zapier automatically create output fields based on your prompt.
If you do not add any output fields, AI by Zapier will return one combined output as the result.
Advanced options
Under Settings, click Advanced to expand the section and configure:
- Return a list of results: toggle on to return the output as line items (an array of objects instead of a single object). This is useful for creating multiple outputs from a single prompt.
- Content moderation: toggle on to check requests against content policies for safe and appropriate usage. If you are using your own API key and want to bypass content moderation, toggle this off.
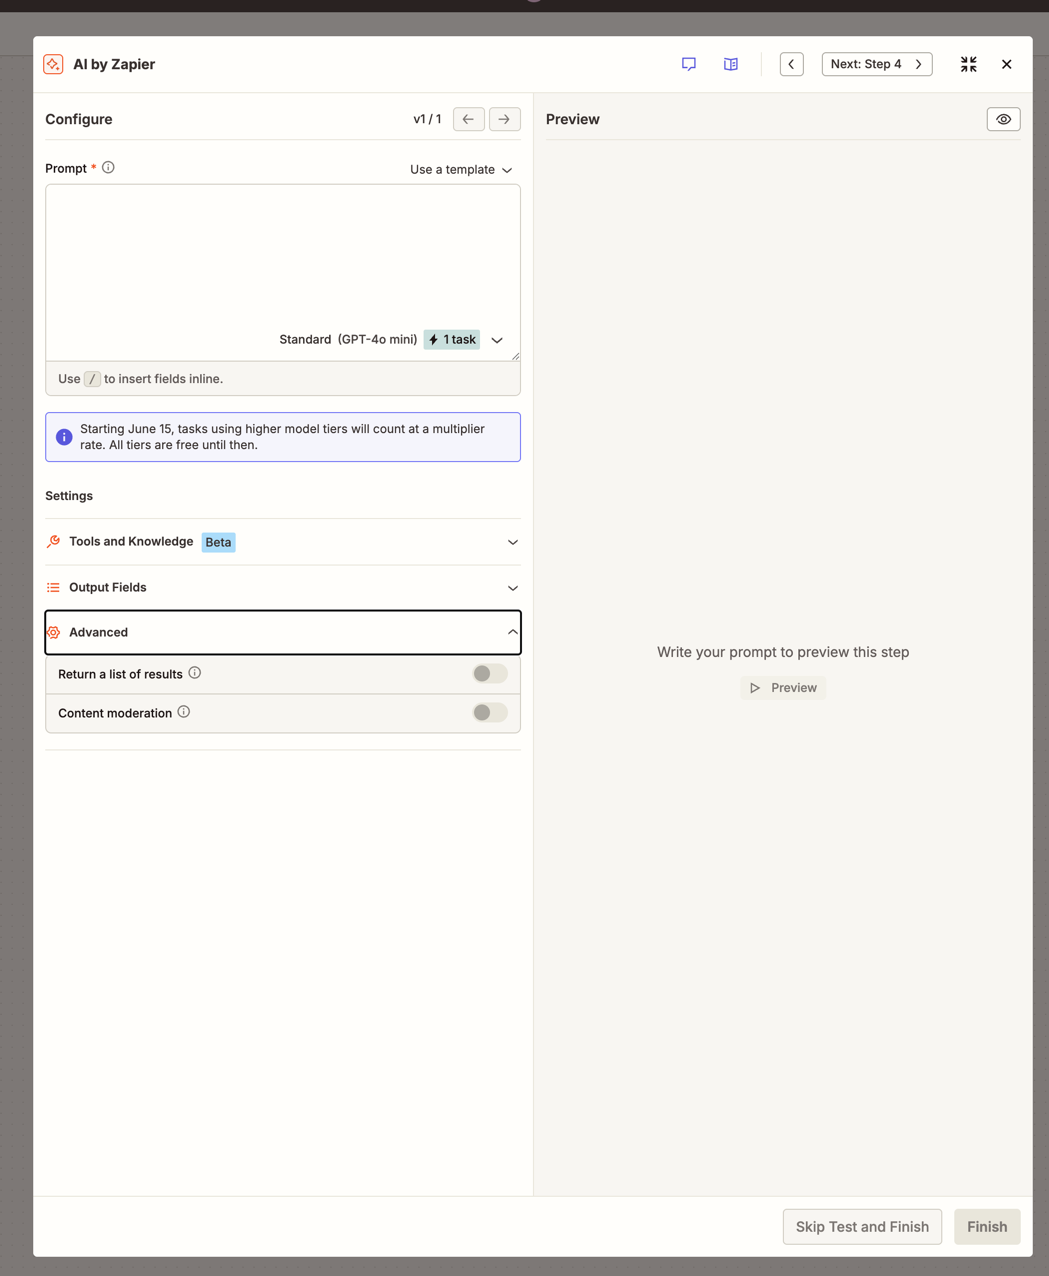
To use knowledge sources or app actions as tools in your step, expand Tools and Knowledge under Settings, or go to Add tools to your AI by Zapier step.
4. Preview your data output
- Click Preview in the right panel to run a test of your prompt.
- Review the output and edit the prompt or settings as needed.
- Click Finish to save and continue building your Zap. If you do not want to test, click Skip Test and Finish.
Available knowledge sources
| Knowledge source | Limitations |
|---|---|
| Box |
|
| Confluence Cloud |
|
| Dropbox |
|
| Google Docs |
|
| Google Drive |
|
| Microsoft SharePoint |
|
| Notion |
|
| Upload a file |
|
Limitations
- AI by Zapier does not learn from previous actions. Each time an AI by Zapier action runs, the AI knowledge is reset to its initial state.
- AI by Zapier uses large language models (LLMs) from Zapier’s AI Functionality Subprocessors. Your AI by Zapier step may fail if its content violates the subprocessors’ usage policies.
- AI by Zapier cannot search and extract information from websites or any URLs.
- You can include up to 20 knowledge sources in each AI by Zapier step.
- Knowledge sources are stored in your Zapier account until you delete the specific content or entire Zap from within the product.
- When using image analysis, the image must be publicly accessible.
If you need advanced AI controls, you can use one of the many AI apps on Zapier.
Next steps
- Add tools to your AI by Zapier step: Let AI by Zapier use apps and knowledge sources to complete your prompt.
- AI by Zapier model tier pricing: Understand how task usage is calculated for AI by Zapier steps.
- Migrating from Agents to AI by Zapier: If you used Zapier Agents, learn how your agents convert to AI by Zapier steps.