You can manage your assets across all Zapier products–Zap workflows, Tables, forms, Chatbots, Canvas, and Agents–from the Assets page. It includes multi-product folders as well as product-specific asset pages that provide you with different views of your assets.
Available on plans:
Free
Professional
Team
Enterprise
Accessing the Assets page
To go to the Assets page, click the assets icon in the left sidebar on any main Zapier page. Once there, there’s a second left-hand sidebar that you can use to navigate between folders and product-specific asset pages.
Manage folders
You can manage folders from the top-level Folders page or from within a specific folder.
Share a folder
To share a folder with another user or team in your account:
- From: - The Folders page, click the menu icon next to the folder. A dialog box will appear that displays a list of all users and teams that already have access. - A specific folder page, click the Share button in the top menu. A dialog box will appear that displays a list of all users and teams that already have access.
- Click the Add member or team search box. A dropdown menu will appear.
- Search for and select the member or team you want to share with.
- Click Share to add them as an editor to the list of users who the folder is shared with.
To stop sharing:
- From: - The Folders page, click the menu icon next to the folder. A dialog box will appear that displays a list of all users and teams that already have access. - A specific folder page, click the Share button in the top menu. A dialog box will appear that displays a list of all users and teams that already have access.
- Select the dropdown menu next to the member or team’s name.
- Select Remove access.
Zap workflows can only be shared individually from within the Zap editor or by sharing the folder they are in. They will not display the Share button.
Rename a folder
To change the name of a folder:
- From: 1. The Folders page, click the menu icon next to the folder. A dropdown menu will open with additional management options. 2. A specific folder page, click the menu icon in the top menu. A dropdown menu will open with additional management options.
- Click Rename. A dialog box will appear.
- In the Name field, enter a new name for your folder.
- Click Save.
Create a subfolder
To create a subfolder within an existing folder:
- From: - The Folders page, click the menu icon next to the folder. A dropdown menu will open with additional management options. - A specific folder page, click the menu icon in the top menu. A dropdown menu will open with additional management options.
- Click Create subfolder. A dialog box will appear.
- In the Name field, enter a name for your folder.
- Click Save. You will be redirected to your new subfolder.
Subfolders will automatically inherit sharing settings from the top-level folder.
Move a folder
To move a folder into another folder:
- From: - The Folders page, click the menu icon next to the folder. A dropdown menu will open with additional management options. - A specific folder page, click the menu icon in the top menu. A dropdown menu will open with additional management options.
- In the top menu, click Move to folder. A dialog box will appear.
- In the search bar, search for and select a folder.
- Click Move to folder.
To move a subfolder into the top folder level:
- From: - The Folders page, click the menu icon next to the folder. A dropdown menu will open with additional management options. - A specific folder page, click the menu icon in the top menu. A dropdown menu will open with additional management options.
- Click Move to folder. A dialog box will appear.
- Click Move to top level. The dialog box will update to a new screen.
- Click Move folder to confirm the move.
Subfolders will automatically inherit sharing settings from the top-level folder, replacing any previous sharing settings. If you move a top-level folder so it becomes a subfolder, then move it again into a top-level position, its previous sharing settings will be restored.
Delete a folder
To delete a folder:
- From: - The Folders page, click the menu icon next to the folder. A dropdown menu will open with additional management options. - A specific folder page, click the menu icon in the top menu. A dropdown menu will open with additional management options.
- Click Delete. A dialog box will appear.
- Click Delete folder to confirm deletion.
You cannot delete a folder if it contains assets or subfolders.
You cannot recover a deleted folder.
Pin a canvas to a folder's documentation tab
Each folder has a documentation tab where you can pin one canvas for quick access. The canvas must already be in the folder to be pinned.
To pin a canvas to a folder's documentation tab:
- Open the folder from the Folders page.
- Click the Documentation tab in the folder view.
- Click Pin canvas and select a canvas that is already in that folder.
To unpin or change the pinned canvas, open the folder's Documentation tab and click Unpin canvas, then go through the steps again to select a different canvas.
Each folder can have only one pinned canvas. Permissions for the documentation tab and pinned canvas follow the folder's sharing settings.
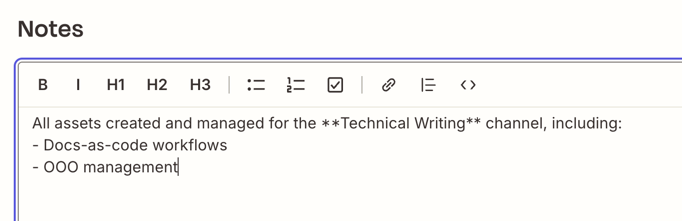
Add notes to a folder's documentation tab
Each folder's documentation tab includes a notes area where you can add and format text using the toolbar or markdown. Use it to describe the folder's purpose, document team processes, or keep track of important details.
To add or edit notes:
- Open the folder from the Folders page.
- Click the Documentation tab in the folder view.
- Click the notes area and start typing.
- Use the formatting toolbar above the notes area to apply formatting, or type markdown syntax directly.
- Click the Preview tab to see how your notes will look, or click Edit to continue editing.
The notes area supports the following formatting:
- Headers.
- Bold and italic.
- Numbered lists, bullet lists, and checkbox lists.
- Quotes, links and code.
- Markdown syntax.
Notes are visible to everyone the folder is shared with. Permissions follow the folder's sharing settings.
Manage assets
You can manage assets from within a specific folder or from the product-specific asset page. It displays different options depending on the product.
- Assets may display different management options depending on which product type it is. If an option is not available in the folder page, open the asset to access those options.
- Agents does not have a product-specific asset page. When you select it from the second left-hand sidebar, you will be redirected to the main Agents page. You can manage your agents from that page. - Agents will appear in your folders, but you cannot manage your agents within folders.
Zap workflows
You can manage your Zap from either the specific folder where it’s located or from the Zap workflows-specific product page. In the list row where the Zap is located, click the menu icon to find additional management options:
- Rename: lets you change the name of your Zap.
- View history: redirects you to the Zap history page for the Zap.
- Duplicate: makes a copy of the Zap.
- Change owner: transfers ownership of the Zap to another user in your account.
- Move to folder: transfers the Zap to another folder in your account.
- Delete: moves the Zap into the Trash folder.
Zap workflows can only be shared individually from within the Zap editor or by sharing the folder they are in. They will not display the Share button.
Rename your Zap
To rename your Zap:
- Select Rename from the dropdown menu. A dialog box will appear.
- In the Name field, enter a new name for your folder.
- Click Save.
Duplicate your Zap
To make a copy of your Zap:
- Select Duplicate from the dropdown menu. A dialog box will appear.
- Select either: - Duplicate to make a copy. The dialog box will close and you will not be redirected to another page. - Duplicate and edit to make a copy. The dialog box will close and you will be redirected to the Zap editor to make changes to the Zap.
The new Zap will be named “(Copy) ”, where is the name of the original Zap it was copied from.
When you duplicate a Zap, only the published version is copied. Any unpublished draft changes are not included in the duplicate.
Change your Zap’s owner
To transfer ownership of the Zap to another user in your account:
- Select Change owner from the dropdown menu. A dialog box will appear.
- In the New owner field, search for and select another user in your account.
- Click Change owner.
Move your Zap to another folder
To transfer the Zap to another folder in your account:
- Select Move to folder from the dropdown menu. A dialog box will appear.
- In the search bar, search for and select a folder.
- Click Move to folder.
Delete your Zap
To move your Zap to the Trash folder:
- Select Delete from the dropdown menu. A dialog box will appear.
- Click Delete Zap. If the Zap is on, it will turn off and move to the Trash folder for 30 days before it’s permanently deleted.
To restore it:
- Go to the Zap workflows-specific product page.
- In the top menu, click Trash. You will be redirected to the Trash folder.
- Next to the Zap you want to restore, click the menu icon in the top menu. A dropdown menu will open with additional management options.
- Select Move to folder from the dropdown menu. A dialog box will appear.
- In the search bar, search for and select a folder.
- Click Move to folder.
You cannot restore items from Trash into your personal folder. To restore an item, create a new folder or select an existing one.
Tables
You can manage your table from either the specific folder where it’s located or from the Tables-specific product page. In the list row where the table is located, you can click:
- The Share button to share the table with other users or teams in your account.
- The menu icon next to the table to open a dropdown menu will open with additional management options: - Rename: lets you change the name of your table. - Move to folder: transfers the table to another folder in your account. - Change owner: transfers ownership of the table to another user in your account. - Delete: permanently deletes the table.
Share your table
To share your table with other users or teams in your account:
- Click the Share icon from the dropdown menu. 1. A dialog box will appear that displays a list of all users and teams that already have access.
- Click the Add member or team search box. A dropdown menu will appear.
- Search for and select the member or team you want to share with.
- In the dropdown menu, select an asset role for the user or team: 1. Editor. 2. Viewer.
- Click Share to add them as an editor to the list of users who the folder is shared with.
To stop sharing your table, or change a user’s asset role:
- Click the Share icon from the dropdown menu. - A dialog box will appear that displays a list of all users and teams that already have access.
- Select the dropdown menu next to the member or team’s name.
- Select a new asset role to change it or Remove access to stop sharing.
Rename your table
To rename your table:
- Select Rename from the dropdown menu. A dialog box will appear.
- In the Table name field, enter a new name for your folder.
- (Optional) in the Description field, enter an explanation of what the table is used for.
- Click Save.
Move your table to another folder
To transfer the table to another folder in your account:
- Select Move to folder from the dropdown menu. A dialog box will appear.
- In the search bar, search for and select a folder.
- Click Move to folder.
Change your table’s owner
To transfer ownership of the table to another user in your account:
- Select Change owner from the dropdown menu. A dialog box will appear.
- In the New owner field, search for and select another user in your account.
- Click Change owner.
Delete your table
To permanently delete your table:
- Select Delete from the dropdown menu. A dialog box will appear.
- Click Delete.
Forms
You can manage your form project from either the specific folder where it’s located or from the Forms-specific product page. In the list row where the form is located, you can click:
- The Share button to share the form with other users or teams in your account.
- The menu icon next to the form to open a dropdown menu will open with additional management options: - Move to folder: transfers the form to another folder in your account. - Change owner: transfers ownership of the form to another user in your account. - Delete: permanently deletes the form.
Share your form project
To share your form project with other users or teams in your account:
- Click the Share icon from the dropdown menu. 1. A dialog box will appear that displays a list of all users and teams that already have access.
- Click the Add member or team search box. A dropdown menu will appear.
- Search for and select the member or team you want to share with.
- Click Share to add them as an editor to the list of users who the folder is shared with.
To stop sharing your form project:
- Click the Share icon from the dropdown menu. - A dialog box will appear that displays a list of all users and teams that already have access.
- Select the dropdown menu next to the member or team’s name.
- Select Remove access.
Move your form project to another folder
To transfer the form to another folder in your account:
- Select Move to folder from the dropdown menu. A dialog box will appear.
- In the search bar, search for and select a folder.
- Click Move to folder.
Change the form's owner
To transfer ownership of the form project to another user in your account:
- Select Change owner from the dropdown menu. A dialog box will appear.
- In the New owner field, search for and select another user in your account.
- Click Change owner.
Delete your form project
To permanently delete your form project:
- Select Delete from the dropdown menu. A dialog box will appear.
- Click Delete.
Chatbots
You can manage your chatbot from either the specific folder where it’s located or from the Chatbots-specific product page. In the list row where the chatbot is located, you can click:
- The Share button to share the chatbot with other users or teams in your account.
- The menu icon next to the chatbot to open a dropdown menu will open with additional management options: - Move to folder: transfers the chatbot to another folder in your account. - Change owner: transfers ownership of the chatbot to another user in your account. - Delete: permanently deletes the chatbot.
Share your chatbot
To share your chatbot with other users or teams in your account:
- Click the Share icon from the dropdown menu. 1. A dialog box will appear that displays a list of all users and teams that already have access.
- Click the Add member or team search box. A dropdown menu will appear.
- Search for and select the member or team you want to share with.
- Click Share to add them as an editor to the list of users who the folder is shared with.
To stop sharing your chatbot, or change a user’s asset role:
- Click the Share icon from the dropdown menu. - A dialog box will appear that displays a list of all users and teams that already have access.
- Select the dropdown menu next to the member or team’s name.
- Select a new asset role to change it or Remove access to stop sharing.
Move your chatbot to another folder
To transfer the chatbot to another folder in your account:
- Select Move to folder from the dropdown menu. A dialog box will appear.
- In the search bar, search for and select a folder.
- Click Move to folder.
Change your chatbot’s owner
To transfer ownership of the chatbot to another user in your account:
- Select Change owner from the dropdown menu. A dialog box will appear.
- In the New owner field, search for and select another user in your account.
- Click Change owner.
Delete your chatbot
To permanently delete your chatbot:
- Select Delete from the dropdown menu. A dialog box will appear.
- Click Delete.
Canvases
You can manage your canvas from either the specific folder where it’s located or from the Canvases-specific product page. In the list row where the canvas is located, you can click:
- The Share button to share the canvas with other users or teams in your account.
- The menu icon next to the canvas to open a dropdown menu will open with additional management options: - Move to folder: transfers the canvas to another folder in your account. - Change owner: transfers ownership of the canvas to another user in your account. - Delete: permanently deletes the canvas.
Share your canvas
To share your canvas with other users or teams in your account:
- Click the Share icon from the dropdown menu. 1. A dialog box will appear that displays a list of all users and teams that already have access.
- Click the Add member or team search box. A dropdown menu will appear.
- Search for and select the member or team you want to share with.
- In the dropdown menu, select an asset role for the user or team: 1. Editor. 2. Viewer.
- Click Share to add them as an editor to the list of users who the folder is shared with.
To stop sharing your canvas:
- Click the Share icon from the dropdown menu. - A dialog box will appear that displays a list of all users and teams that already have access.
- Select the dropdown menu next to the member or team’s name.
- Select Remove access.
Move your canvas to another folder
To transfer the canvas to another folder in your account:
- Select Move to folder from the dropdown menu. A dialog box will appear.
- In the search bar, search for and select a folder.
- Click Move to folder.
Delete your canvas
To permanently delete your canvas:
- Select Delete from the dropdown menu. A dialog box will appear.
- Click Delete.
Limitations
Zapier account
- Your account can have a maximum of 10,000 folders, including both personal and shared folders.
- You cannot rename or delete your personal folder. You also cannot create subfolders within your personal folder.
-
Only super admins or owners of Team or Enterprise accounts can view all assets in the account.
- Members can only view their own Zap workflows or Zap workflows that are shared with them.
- Learn more about user roles and permissions.
- When you remove a user from your account, ownership of their Zap workflows and folders will transfer to a new owner that you designate, or to the account owner.
Moving assets
- You can move up to 100 folders within a 1-hour period.
- You can add up to five nested subfolders in your Zap.
- Moving a folder into a shared folder will change its sharing settings. It will match the settings of the new parent folder.
Deleting assets
- You cannot delete a folder until you move out or delete all Zap workflows within it.
- You cannot move a subfolder into one of its own subfolders.
- Account admins, super admins, and owners can also delete a shared folder if it does not contain any Zap workflows.