When someone shares a guided template with you, you can use it to create your own Zap. It walks you through connecting your accounts, filling in editable fields, and publishing your Zap. Learn more about guided templates.
Available on plans:
Free
Professional
Team
Enterprise
Prerequisites
You must be logged in to your Zapier account. If you try to use a guided template link while logged out, you'll see a 404 error page.
Select a guided template
You can access a guided template via its share link or the Templates page.
- Log into your Zapier account.
- Open the share link. You will be redirected to a landing page for that guided template.
- Click Try it. You will be redirected to the Zap editor with the guided template wizard open to the Getting started section.
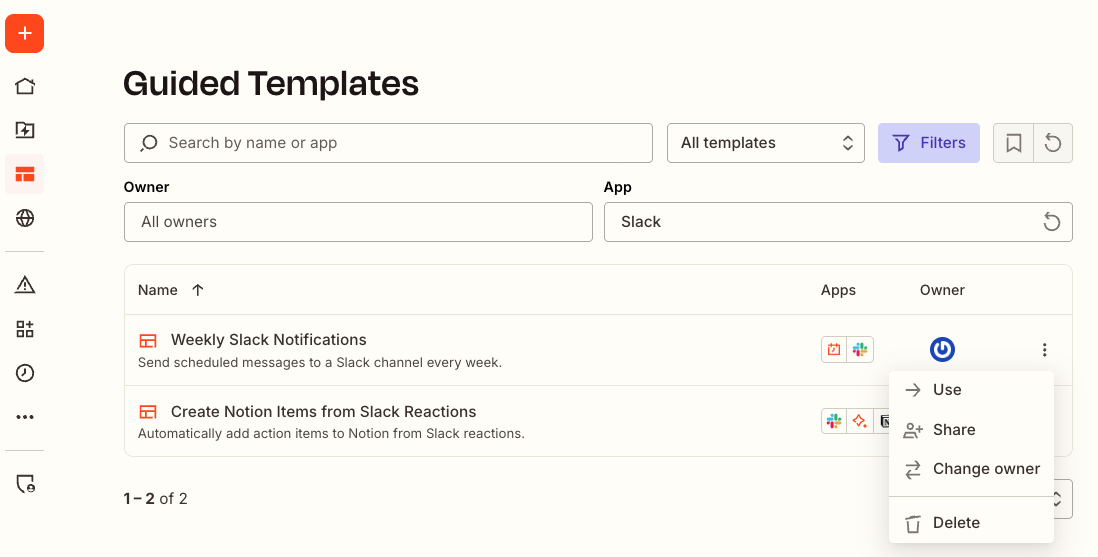
- In the main navigation, click the Templates icon . You will be redirected to the Guided templates page.
- In the list of guided templates, click the settings icon next to the template you want to use. A dropdown menu will open.
- Click Use. You will be redirected to the Zap editor with the guided template wizard open to the Getting started section.
Set up your Zap
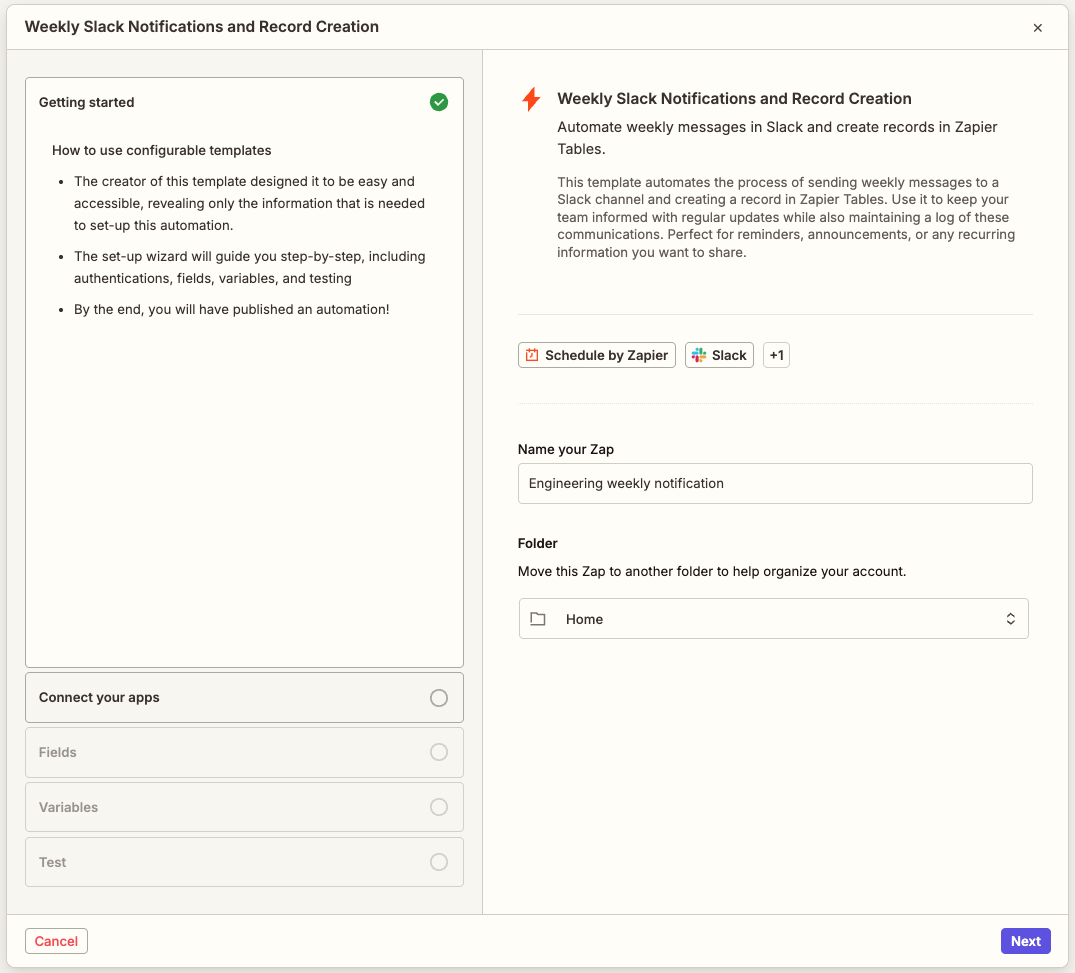
The wizard will walk you through how to use a guided template. It will consist of the following sections:
- Getting started.
- Connect your apps.
- Fields.
- Variables.
- Test.
Each section will consist of:
-
A left panel with:
- Help information that explains what you need to do.
- An outline of the sections you need to complete.
- A right panel where you will configure your Zap.
Getting started section
In the Getting started section, you will enter basic information about the Zap.
- In the Title field, enter a name for your Zap.
- In the Folder field, click the dropdown menu to expand it.
- Search for and select the folder where you want to store the Zap.
- Click Next to continue to the Connect your apps section.
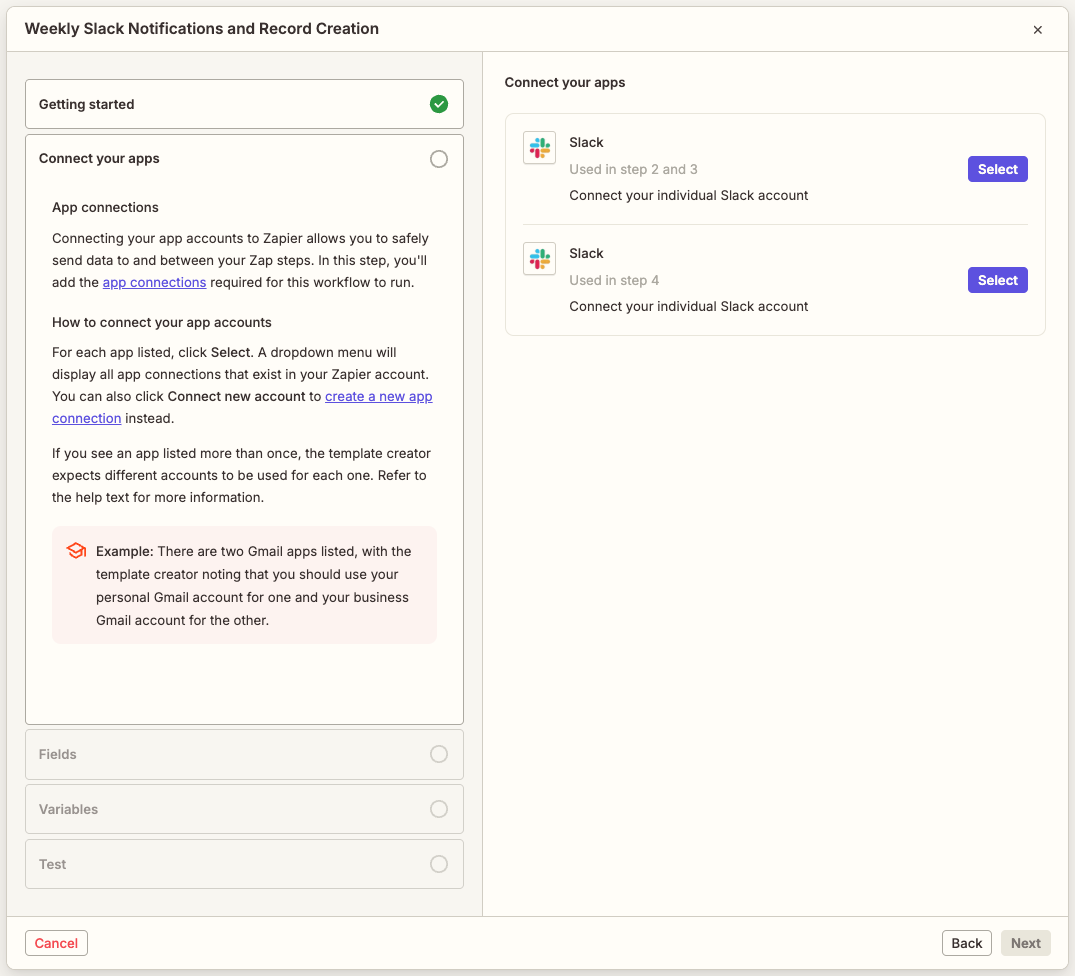
Connect your apps section
In the Connect your apps section, you will set up the app connections you want to use in the Zap. The guided template will list each unique app connection you will use in your Zap. For example, if the template uses two different Slack accounts in 5 different steps, you will see two app connections listed.
Adding your app connections allows you to safely send data to and between steps. After you connect your accounts, all mapped fields in the Zap will automatically update.
- Click Select next to an app connection in the list. A dropdown menu will open.
- Search for and select an existing app connection or click + Connect a new account to create a new app connection.
- Repeat for each app connection in the list.
- Click Next to continue to the Fields section.
Fields section
The Fields section lists all of the Zap's steps and all fields that contain values. If a step is grayed out and disabled, its field values are locked and you cannot edit them.
- Select an editable step in your Zap to expand the accordion for that step.
- Click the dropdown menu next to a field to expand it.
- Enter a value in the field.
- Repeat for all fields in your Zap.
- Click Next to continue to the Variables section.
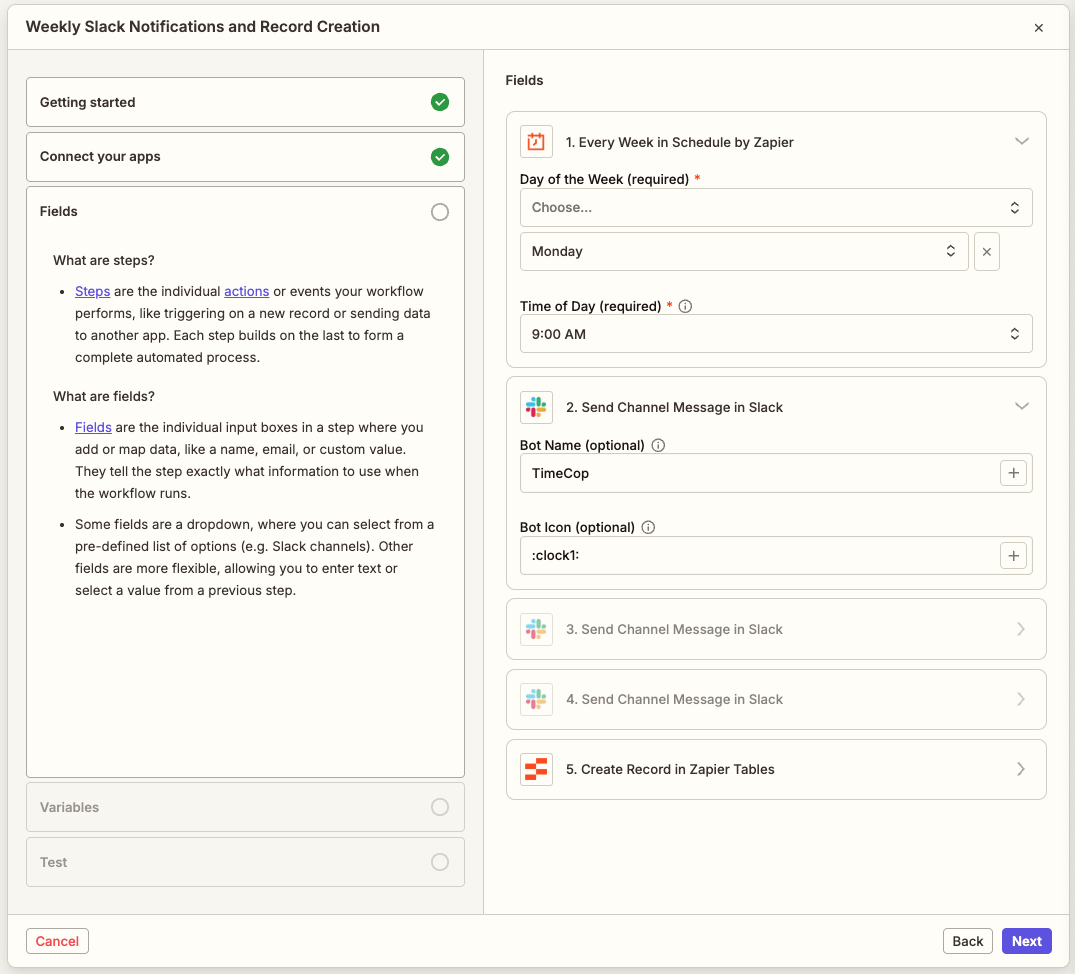
- Editable fields will display the default value from the original Zap that the guided template was created from. You can keep the value or change it.
- You can review the help text for a field by clicking the info icon next to the field. A tooltip will appear with additional info.
Variables section
Variables are a way to store reusable values that you can map to other fields in your Zap workflows. The guided template will display any Zap or global variables used in the original Zap. The creator of the guided template may allow you to edit the value of a variable. If so, when you enter a new value, it will apply to every use of that variable in the Zap. The creator of the template may have also already suggested values for some of these variables. If the creator does not allow you to edit the value of the variable, the Zap will use the preconfigured value.
- If a variable is editable, click its input box.
- Enter a new value for the variable.
- Click Next to continue to the Test section.
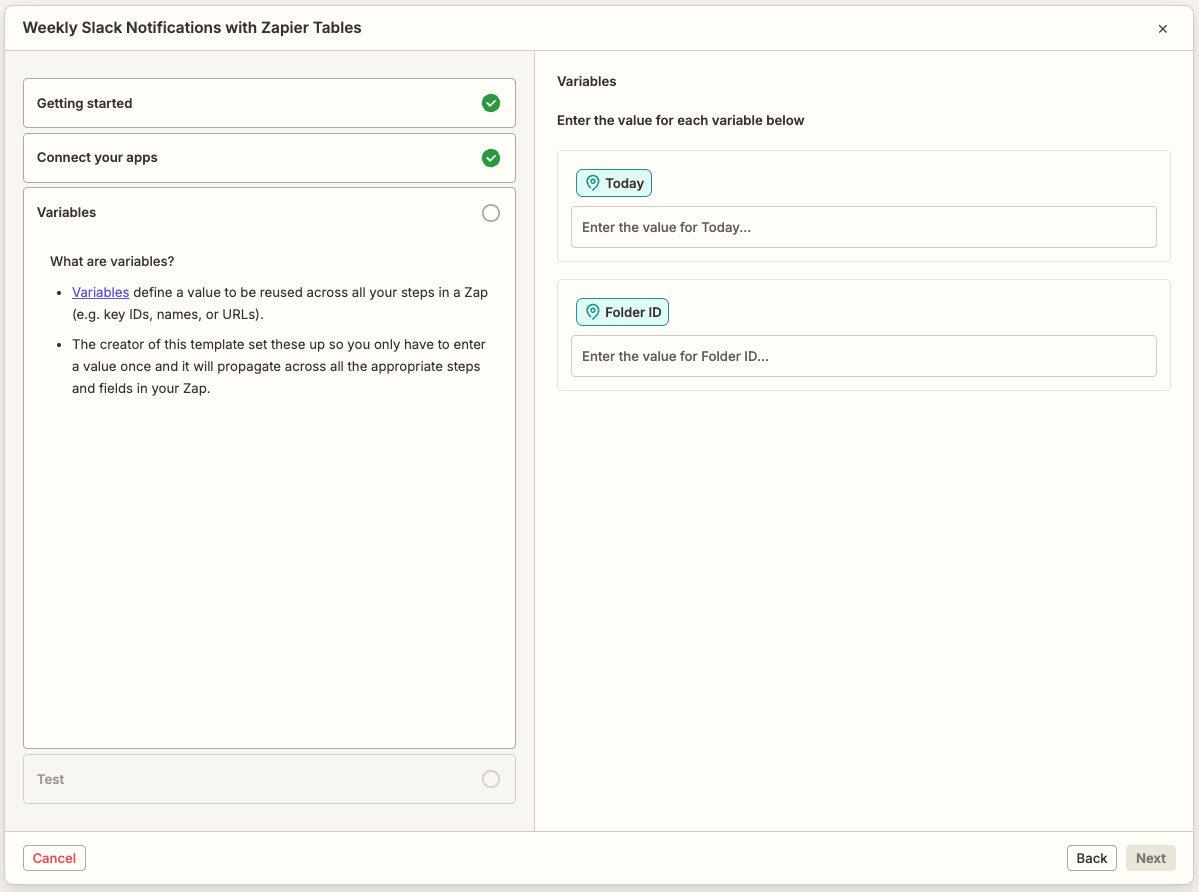
- The guided template will not display system variables, only Zap and global variables. You must be on a paid Zapier plan to use global variables.
- Global variables in the original Zap are converted to Zap templates when you use the guided template to create your own Zap.
Test section
Testing your Zap is optional but highly recommend to ensure it's working as expected. You must skip or test your Zap before you can publish it.
-
Click either:
- Skip testing to avoid testing.
- Test to run an end-to-end test of each step in the Zap.
- If there are no issues, click Publish Zap to turn on your Zap.
In the Test section, if you see a "Test successful! Your Zap is good to publish." note, your data is validated and your Zap is ready to publish.
After publishing, your Zap is fully functional and operates independently from the original Zap that the guided template was created from. You can edit it like any other Zap in your account.
Next steps
- Manage your guided templates to browse and organize guided templates available to you.
- Learn more about guided templates.