Button fields in Zapier Tables allow you to trigger Zap workflows or run actions within a Zap from a table by clicking a button. Each button acts only on the record it’s related to.
Available on plans:
Free
Professional
Team
Enterprise
Zapier tasks used by Tables do not count toward your account's task usage.
Trigger Zap
This type of button sends the specific record to a Zap as a trigger.
- From the Tables home, click the name of your table.
- Click the Add field icon on the right side of a table.
- Select the Button field type. A sidebar will open.
- In the Name field, enter a name for the field.
- In the Default Button Label field, enter a label.
- (Optional) Click the Default State dropdown menu to change the initial state of the button, between enabled or disabled.
- (Optional) Select the Disable button when clicked checkbox to prevent a button from being clicked more than once. You can still re-enable the button manually.
- Click Create. The sidebar will close.
- Click the label Set up button that will appear on the field. The Edit field sidebar will open to the Zap workflows tab.
- Click + Create. A dialog box will open. Click Configure your automation. A new browser window or tab with a pre-populated Zap will open. You can set up your Zap trigger and any other actions.
Continue Zap
This button starts an action to a Zap. You can define up to two different actions for the same field.
- From the Tables home, click the name of your table.
- Click the Add field icon on the right side of a table.
- Select the Button field type. A sidebar will open.
- In the Name field, enter a name for the field.
- In the Type of Button dropdown menu, select Continue Zap.
- Enter a Primary Button Label for the button. If using a second action, enter a Secondary Button Label.
- Click Create. The sidebar will close.
- Click the label Set up button that will appear on the field. The Edit field sidebar will open to the Zap workflows tab.
- Click + Create. A dialog box will open. Click Configure your automation. A new browser window or tab with a pre-populated Zap will open. You can set up your Zap trigger and any other actions.
The Continue button can only be used after the record has been sent to a Zap. Before the record is sent, the button will say "Send to Zap", instead of showing the options to continue the Zap.
Enable and disable buttons
Individual buttons can be re-enabled and disabled by the table owner and editors. This allows you to change the state without triggering or continuing a Zap.
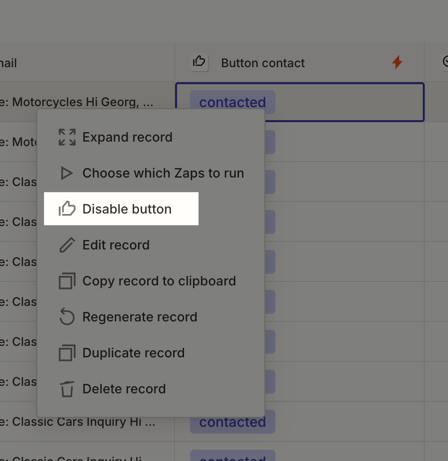
To re-enable or disable a button:
- Right-click the button for the specific record you want to change.
- If the button is enabled, select the option Disable button.
- If the button is disabled, select the option Enable button.
You can change the state of a trigger button (to enable or disable it) through a Zap using the Change Button State action. This does not trigger the Zap, it only updates the button's state and label.
Get information about the button status
Button fields can show additional information about the button status through their label or by hovering over the button.
The button requires setup
If you created a button field (either to trigger or continue a Zap) but did not set up a Zap for it, the button will show the Set up button label. You can click the label to start the Zap setup. Once the Zap is ready, the button will show the label you created.
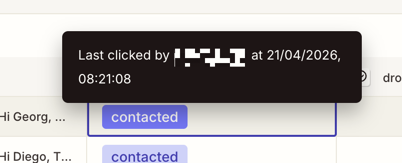
Know when a button was last clicked
If you hover over an existing button, you can see information about who last clicked the button, along with the time and date. If the button was never clicked, you'll see the message "Not clicked yet" when hovering over it. The last clicked option will be highlighted if your Continue Zap button field has a secondary label.
Continue button information
You can also find out if a record has already continued a Zap or if it was created before a Zap was active by hovering over the specific button.
You can also create Zap workflows that automatically add information to a table from another app or start a workflow when there's a new or updated record.