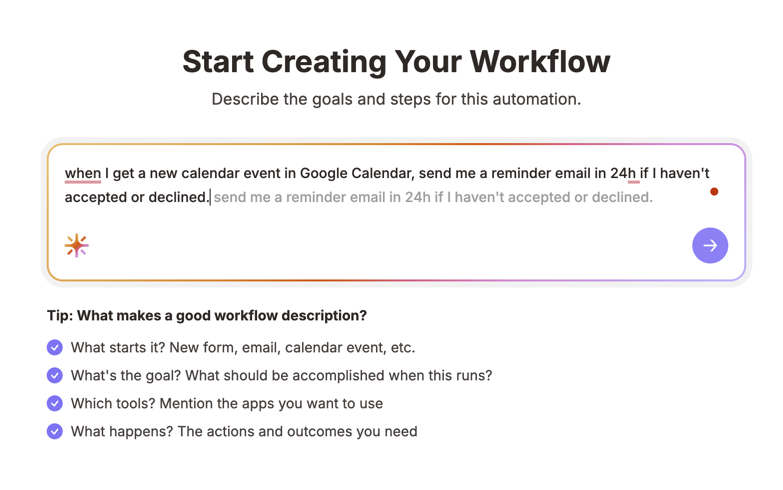
You can create a Zap by describing your workflow in plain language. Tell the new builder what should start your automation, what you want to accomplish, and which apps to use, and it will build a Zap for you. You can turn on your Zap directly from the new builder or open it in the Zap editor to make additional changes.
This feature is in beta. Some features may change as development continues.
Write a strong workflow description
A strong prompt reduces incorrect or unexpected results and helps you get better results sooner. Zapier checks whether your prompt includes the following criteria:
- What starts it? The trigger event, such as a new form submission, incoming email, or calendar event.
- What's the goal? What should be accomplished when the Zap runs?
- Which tools? Mention the apps you want to use.
- What happens? The actions and outcomes you need.
When someone submits a new Google Form, add them as a contact in HubSpot and send me a Slack message in the #sales-leads channel.
This description includes the trigger (new Google Form submission), the apps (Google Forms, HubSpot, Slack), and the actions (create contact, send message).
Create a Zap by describing your workflow
- Visit Zapier and, in the prompt text field, describe your workflow in plain language. You can also have the new builder generate a prompt related to your role by clicking the AI icon .
- Click the arrow button to start generating your workflow.
-
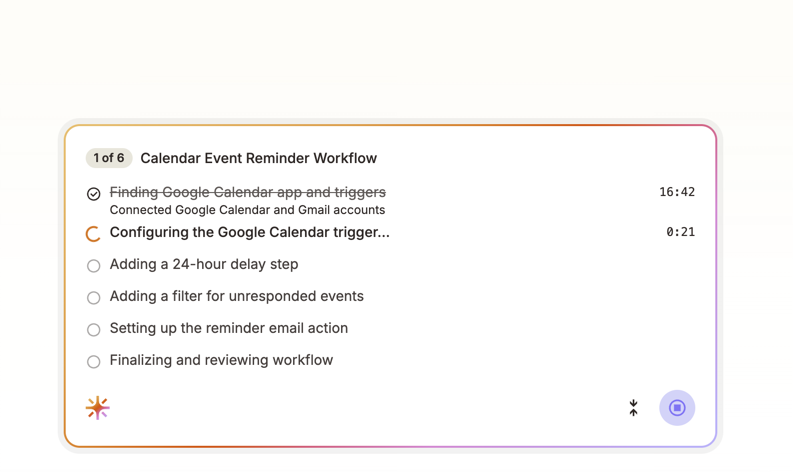
The new builder will display a list with all the necessary steps to complete the workflow. Click Connect button at the bottom of the screen to connect the apps for the workflow.
- Click Skip if you'd like to do this later or select an existing connection. When you click Skip, the new builder will ask you if you'd like to connect an account later or use an existing connection. You can also provide it with different instructions at this point, such as changing the app used in that step.
-
Once all apps are connected, click Test to check that the workflow runs correctly. The new builder will ask you to approve any test actions that create or submit data.
- Click the Stop icon at any time to stop the test.
- If a test fails, you can iterate on the workflow by providing additional instructions. The builder will help diagnose issues and suggest fixes.
-
Once the test is successful, choose how to proceed:
- Click Turn on Zap to publish and activate your workflow immediately.
- Click Publish new draft to save a new version on top of an already-published workflow without replacing it yet.
- Click Go to editor to open the workflow in the Zap editor and make further changes before publishing.
If your account requires peer approval before publishing, click Submit for approval instead. You can cancel a pending approval request at any time if you need to make changes first.
Supported workflow features
The new builder supports the following workflow features:
- Paths and branching logic: Create workflows with conditional logic, such as "if X happens, do Y; otherwise, do Z." Learn more about Paths.
- Loops: Process multiple items in a single Zap run.
- Webhooks: Use webhook triggers to start your workflow from external events.
- Trigger sample selection: Choose or edit the trigger data used during testing to verify your workflow works with different scenarios.
- Diagram view: See a visual representation of your workflow steps and how they connect.
Limitations
- Results may need refinement. The generated Zap may require adjustments. You can continue iterating in the new builder or open the Zap in the Zap editor to adjust any step, field mapping, or connection.
Edit your Zap after building
After building, you can open your Zap in the Zap editor to:
- Add, remove, or edit steps.
- Change apps or actions.
- Map fields between steps.
- Add filters or paths if your plan supports them.