You can share your Zapier Chatbot as a standalone page or embedded on your website. You can also embed a chatbot on Zapier Forms.
Requirements
- You must be the owner of the chatbot, an editor, or a Zapier account Owner or Super admin.
- Zapier Chatbots currently cannot be embedded using Google Tag Manager.
Embed a chatbot as a pop-up
Available on plans:
Free
Pro
Advanced
To embed your chatbot on a website as a pop-up:
- From your Chatbots home, click the name of the chatbot.
- In the next screen, click the Share button on the top right.
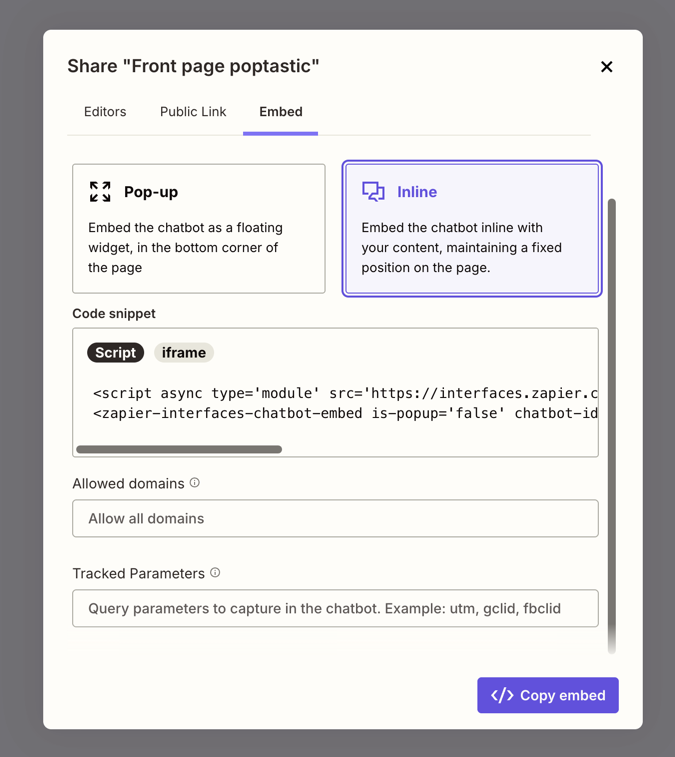
- Click the Embed tab.
- Select Pop-up to embed the chatbot as a floating widget that stays at the bottom right corner of a website.
- (Optional) Use the Allowed domains field to enter the domains that can display the chatbot.
- Click ** Copy embed** to copy the code to your clipboard.
Specify which domains can use the chatbot
When embedding a chatbot, you can ensure it only appears on your target web pages by selecting the domains that can use it.
In the Allowed domains field, paste or type URLs, separated by a comma without any spaces. The domains should not include the protocol (such as http:// or https://) or path (such as /example/path).
Code placement and pop-up behavior
- When using the chatbot as a pop-up overlay, ensure the code is placed in the body of the HTML. If you place it in the header or footer, it will not follow the user as they scroll through a page.
- On a pop-up embed, if a user is having a conversation with a chatbot, the conversation will continue even if they navigate to a different page of your site or refresh the browser.
- The chat pop-up will also remain in the same initial state, either closed or open, when the user navigates to a different page or refreshes the browser.
Add the code to your website builder
Below are links to information on embedding the chatbot in popular website builders.
- Squarespace: Embed blocks
- Wix: Embedding custom code on your site
- Wordpress: Embed content from other platforms
- For dynamic websites, you can add the embed code to the template to make it appear on all pages.
Embed a chatbot inline
Available on plans:
Free
Pro
Advanced
To embed your chatbot inline on a website:
- From your Chatbots home, click the name of the chatbot.
- In the next screen, click the Share button on the top right.
- Click the Embed tab.
-
Select Inline to embed the chatbot as part of a page in a fixed position.
- In the Code snippet field, select either
Scriptoriframe.
- In the Code snippet field, select either
- (Optional) Use the Allowed domains field to enter the domains that can display the chatbot.
- (Optional) Use the Tracked parameters field to track conversions through your chatbot.
- Click ** Copy embed** to copy the code to your clipboard.

Code types for inline embedding
If you select Inline, you can select the code snippet type (Script or iframe) within the Code snippet window. Script HTML tags are a better choice, in general, but if an app or website does not accept them, select iframe instead.
Specify which domains can use the chatbot
When embedding a chatbot, you can ensure it only appears on your target web pages by selecting the domains that can use it.
In the Allowed domains field, paste or type URLs, separated by a comma without any spaces. The domains should not include the protocol (such as http:// or https://) or path (such as /example/path).
Use query parameters
The Tracked parameters field lets you enter query parameters to track chatbot conversions. Any parameters you enter in the Tracked Parameters field become available in Zap steps. The field accepts these values, separated by commas:
- utm
- utm_source
- utm_medium
- utm_campaign
- utm_content
- utm_term
- utm_id
- utm_referrer
- utm_origin
- gclid
- fbclid
- msclkid
- scid
- cid
- aff_id
- For dynamic websites, you can add the embed code to the template to make it appear on all pages.
Add the code to your website builder
Below are links to information on embedding the chatbot in popular website builders.
- Squarespace: Embed blocks
- Wix: Embedding custom code on your site
- Wordpress: Embed content from other platforms
Create a standalone page for your chatbot
You can share your chatbot with anyone using its public URL. This URL is generated by default.
- From your Chatbots home, click the name of the chatbot.
- In the next screen, click the Share button on the top right.
- Click the Public Link tab.
- Click the Access dropdown menu and select Anyone with the link can view.
- Click the Copy link button to copy its public URL and share it with anyone.
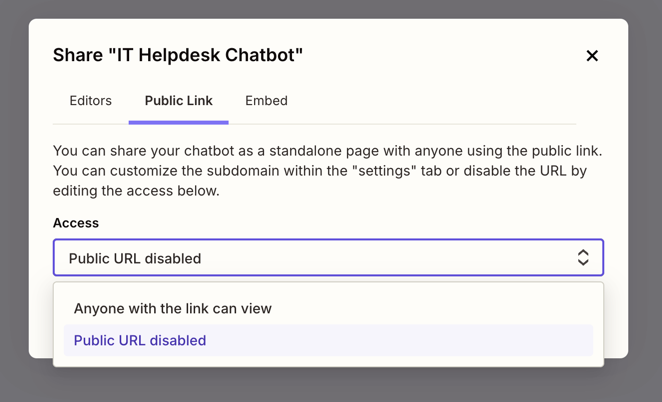
Disable the public URL
If you only want your chatbot to be available through embedding, you can disable the public URL.
- From your Chatbots home, click the name of the chatbot.
- In the next screen, click the Share button on the top right.
- Click the Public Link tab.
- Click the Access dropdown menu and select Public URL disabled. It will save automatically.
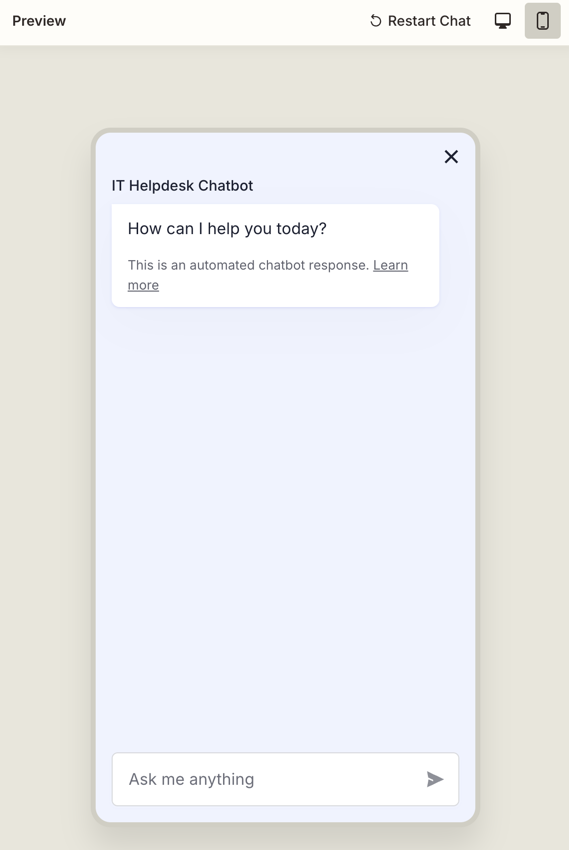
Preview your chatbot
You can preview what your chatbot will look like on desktop and on mobile, before sharing it with your users. The default preview displays how your chatbot appears on desktops. To switch to mobile preview:
- From your Chatbots home, click the name of the chatbot.
- Click the mobile icon at the top of the chat screen. You'll now preview the chat window on a mobile screen.
Embed a chatbot on Zapier Forms
You can add an existing chatbot to Zapier Forms as a new component.
