With Zapier Tables, you can import your data to a new table from a CSV file or from certain apps, or append the content of a CSV to an existing table.
Available on plans:
Free
Professional
Team
Enterprise
Limitations
For CSV files:
- Only comma-delimited CSV files are supported. Files that use other delimiters (such as semicolons, tabs, or pipes) are not compatible.
- UTF-8 encoded.
- Smaller than 50 MB.
For all sources:
- The content of the file must be within the limit of records and fields of your Zapier plan. The importing process will ignore any records or fields beyond the limit of your plan.
Import data into a new table
To import data into a table:
- On the Tables home, click Import data. A dialog box will open.
- Select CSV to upload a file, or select the app you want to import data from.
- Click Choose File to select the file from your computer, or drag and drop a file into the window.
- Click Continue.
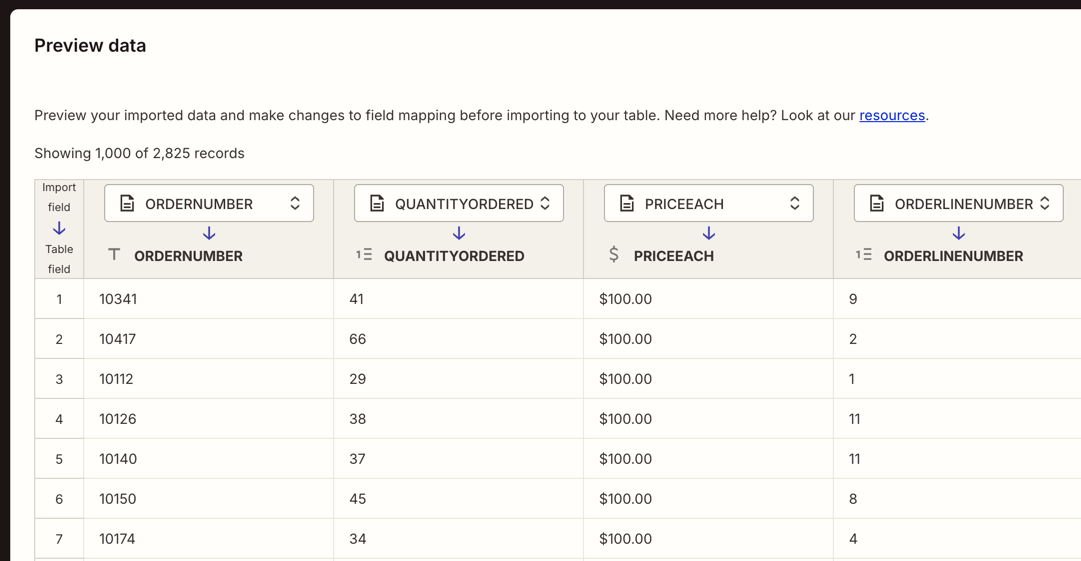
- Zapier Tables will display a preview of the records to be imported. To change a field's type, click the name of the field and select a different type from the dropdown menu.
- Click Continue importing to open your new table.
Depending on the size of your file, the full content may take a few seconds to appear.
Once you select an app, the dialog box will show all existing connections to that app.
- If you do not have any connections, click + Sign in to [app name]. A new tab or window will open where you can create a new connection.
- In the new tab or window, click + Add connection. Follow the onscreen instructions.
- Once your connection is ready, go back to the Zapier Tables tab or window on your browser. - If the connection does not appear, refresh the browser tab or window.
- Select the connection.
- Click Continue.
- Fill out the required fields.
- Click Next. A preview of the content to be imported will appear.
- Select the checkbox beside the fields you want to import. - You can also click Select all to import all fields.
- Click Import data to open your new table.
Import data into an existing table
You can append new records to an existing table from a CSV file. Any new records will be added to the bottom of the table.
The table must have at least the same number of fields as the file. If the table has fewer fields than the file, some fields may not be imported. You can add new fields before you start importing.
- On the Tables home, select your table.
- Click the menu icon at the bottom of the table and select Import records. A dialog box will open.
- Click Choose File to select the file from your computer.
-
A preview of the records that will be imported will appear.
- Click a field's dropdown menu to change which field the content will be sent to.
- Click Continue importing.
Imported records and Zap triggers
Importing records does not trigger a Zap with a Zapier Tables New Record trigger. Only records you add manually, or records added by a Zap or through an MCP client, will trigger your Zap.
To send imported records to a Zap:
- Select the checkbox beside each record you want to send.
- In the menu that appears at the bottom of the screen, click Automate records. A dialog box will open.
- Select all Zap workflows that will receive the records.
- Click Send to Zap workflows.
You can send up to 10,000 records per page. Repeat for each page if your import includes multiple pages.
Data retention
Zapier's Data Retention, deletion, and export practices vary depending on the product. Learn more about the specific guidelines for the product you're using.