If you’re looking to update a row in Microsoft Excel, you will need to first insert a search action to find the row ID. Updating a row will not work without adding this step first unless you plan on updating the exact same row every time the trigger fires. Let's walk through how to do this.
Finding Rows
The first step here is to create a Zap and select your trigger app. For this example, let’s create a Zap that uses MailChimp as the trigger that will update a sheet when a new subscriber is added. This way, we can keep an up to date sheet of contact information in an Excel Spreadsheet.
After setting up the trigger step, you’ll want to add a new step for Excel and choose the "Find or Create Row,” action.
The “Lookup Value” field tells the Zap which data we are going to use from the trigger step to perform the search. For this example, we'll pick “Email" because we want to conduct a search using the email address of the subscriber who was added/updated on your MailChimp list.
In the “Lookup Column" section, you’ll need to choose which column you want to search by in the drop-down menu. In this case, we'll want to pick the “Email Address” column because we want to check if the email addresses of the MailChimp subscribers match any of the email addresses in the “Email Address" column of our Excel Spreadsheet.

The idea here is that we want to use a value to scan through the spreadsheet with to see if any rows have a matching a matching value. If there is a match, the step will be successful and the Zap will move onto the next action step, with the ability to use data from the row that was found.
Note: If there are multiple matches, the Zap will return the first row it finds.
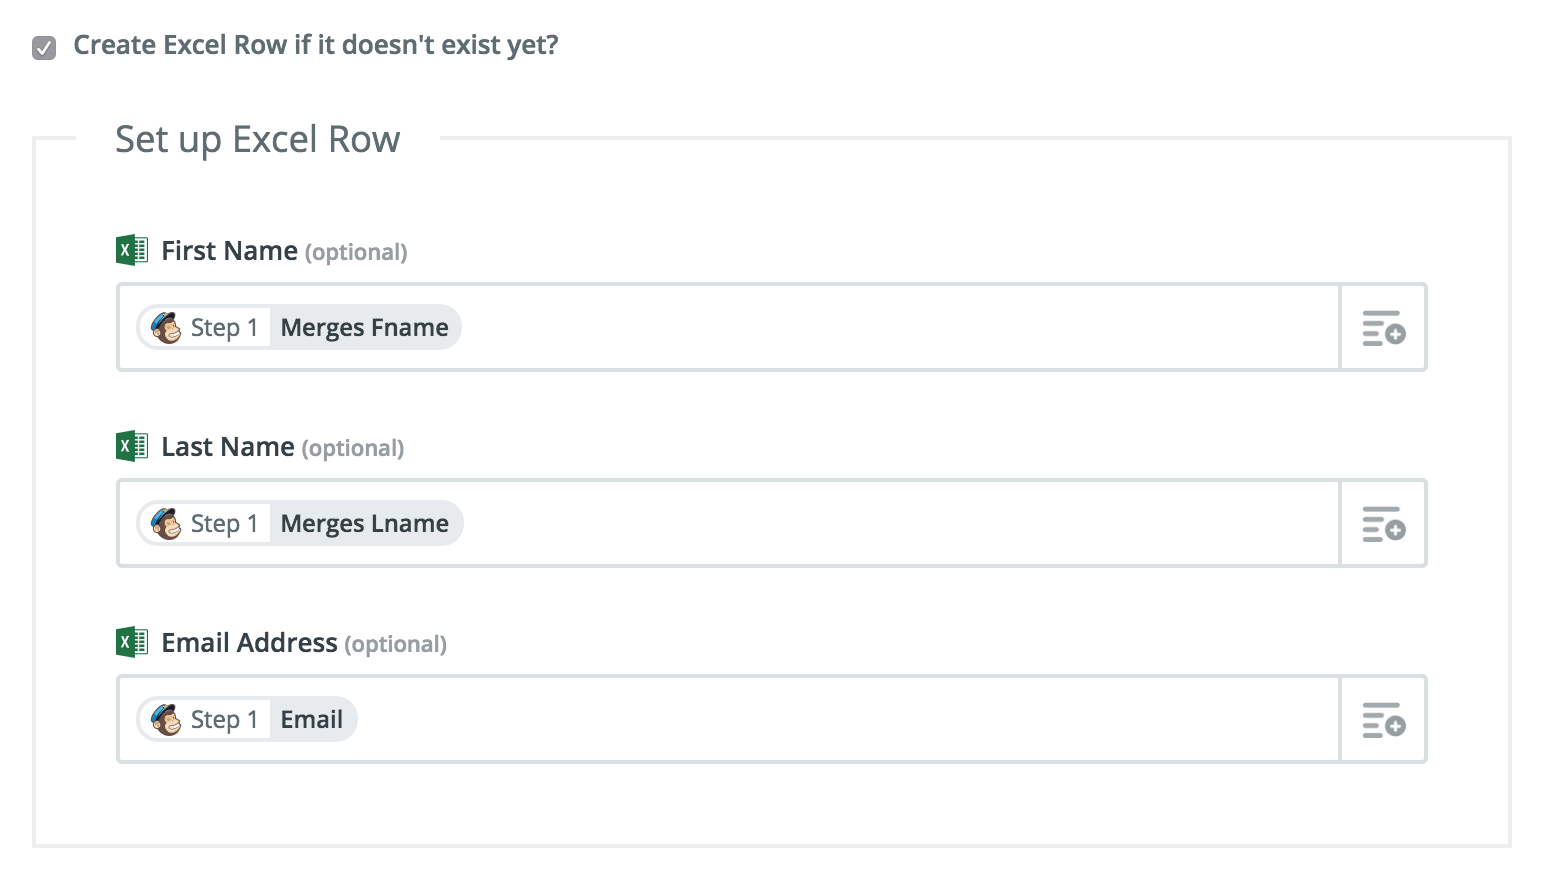
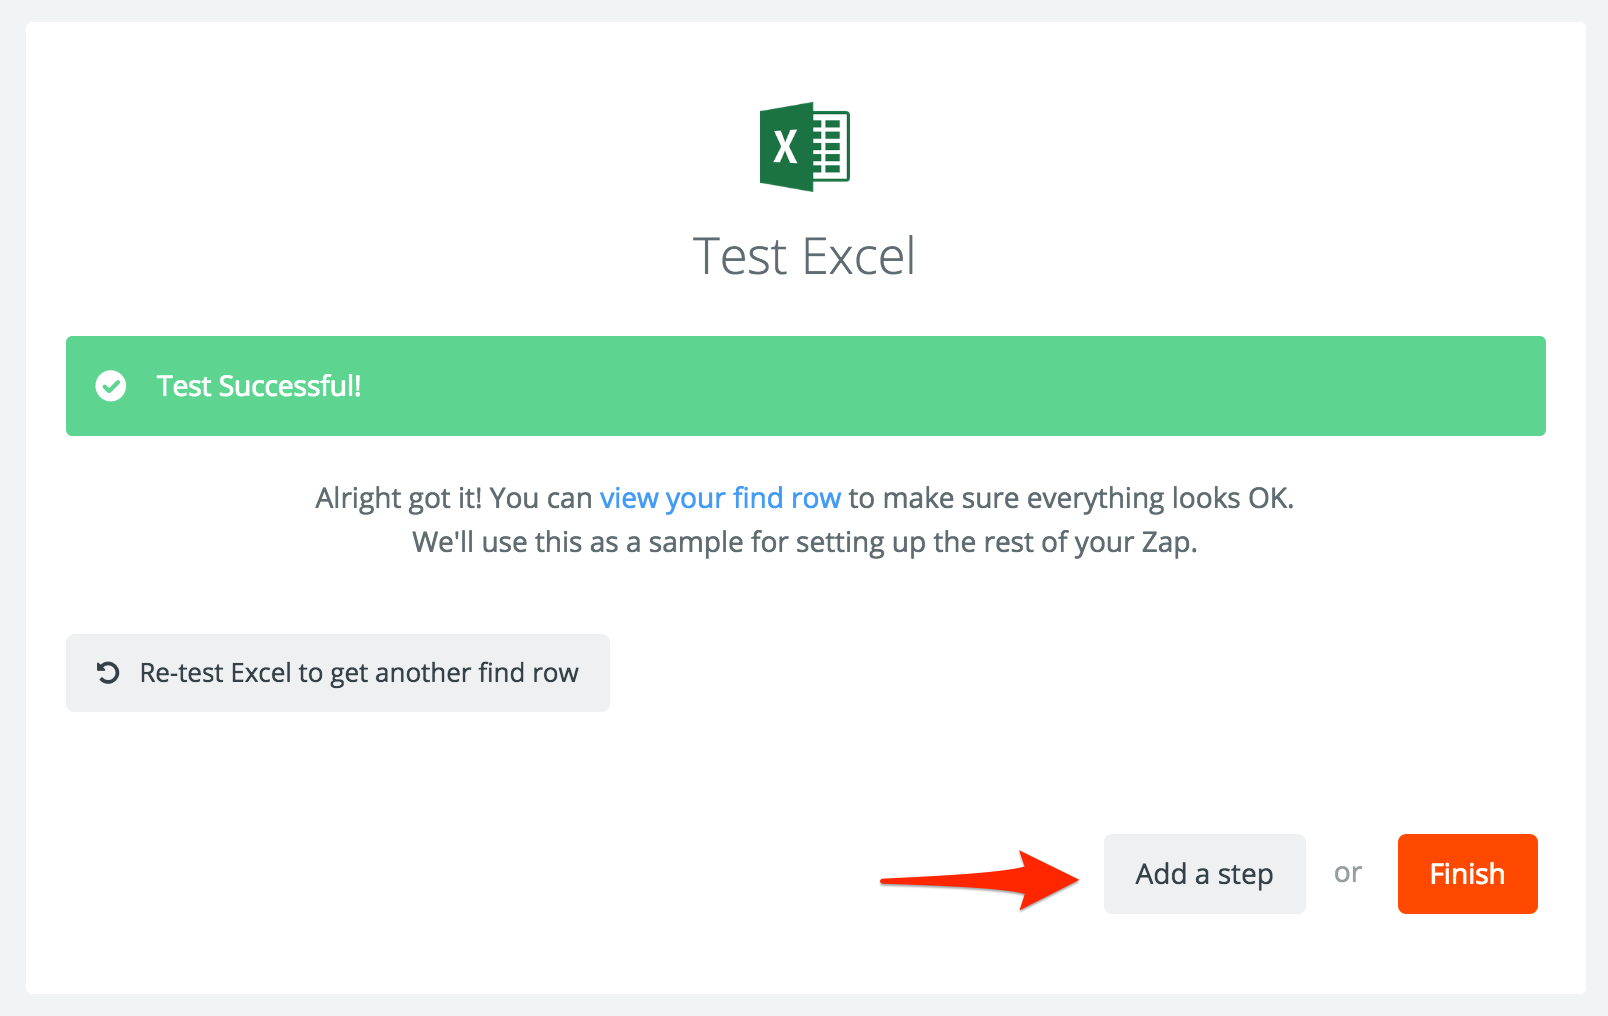
You'll finish up Step 2 by testing it to find a matching row. If the row likely won’t exist yet, you can check the "Create Excel Row if it doesn't exist yet?” box and then tell the Zap how the row should be created.
Updating Rows
Now that the Zap has found your row, you’ll want to use the row ID that was returned to dynamically update records. You’ll want to click on the “Add a step” button to create another step in your Zap.
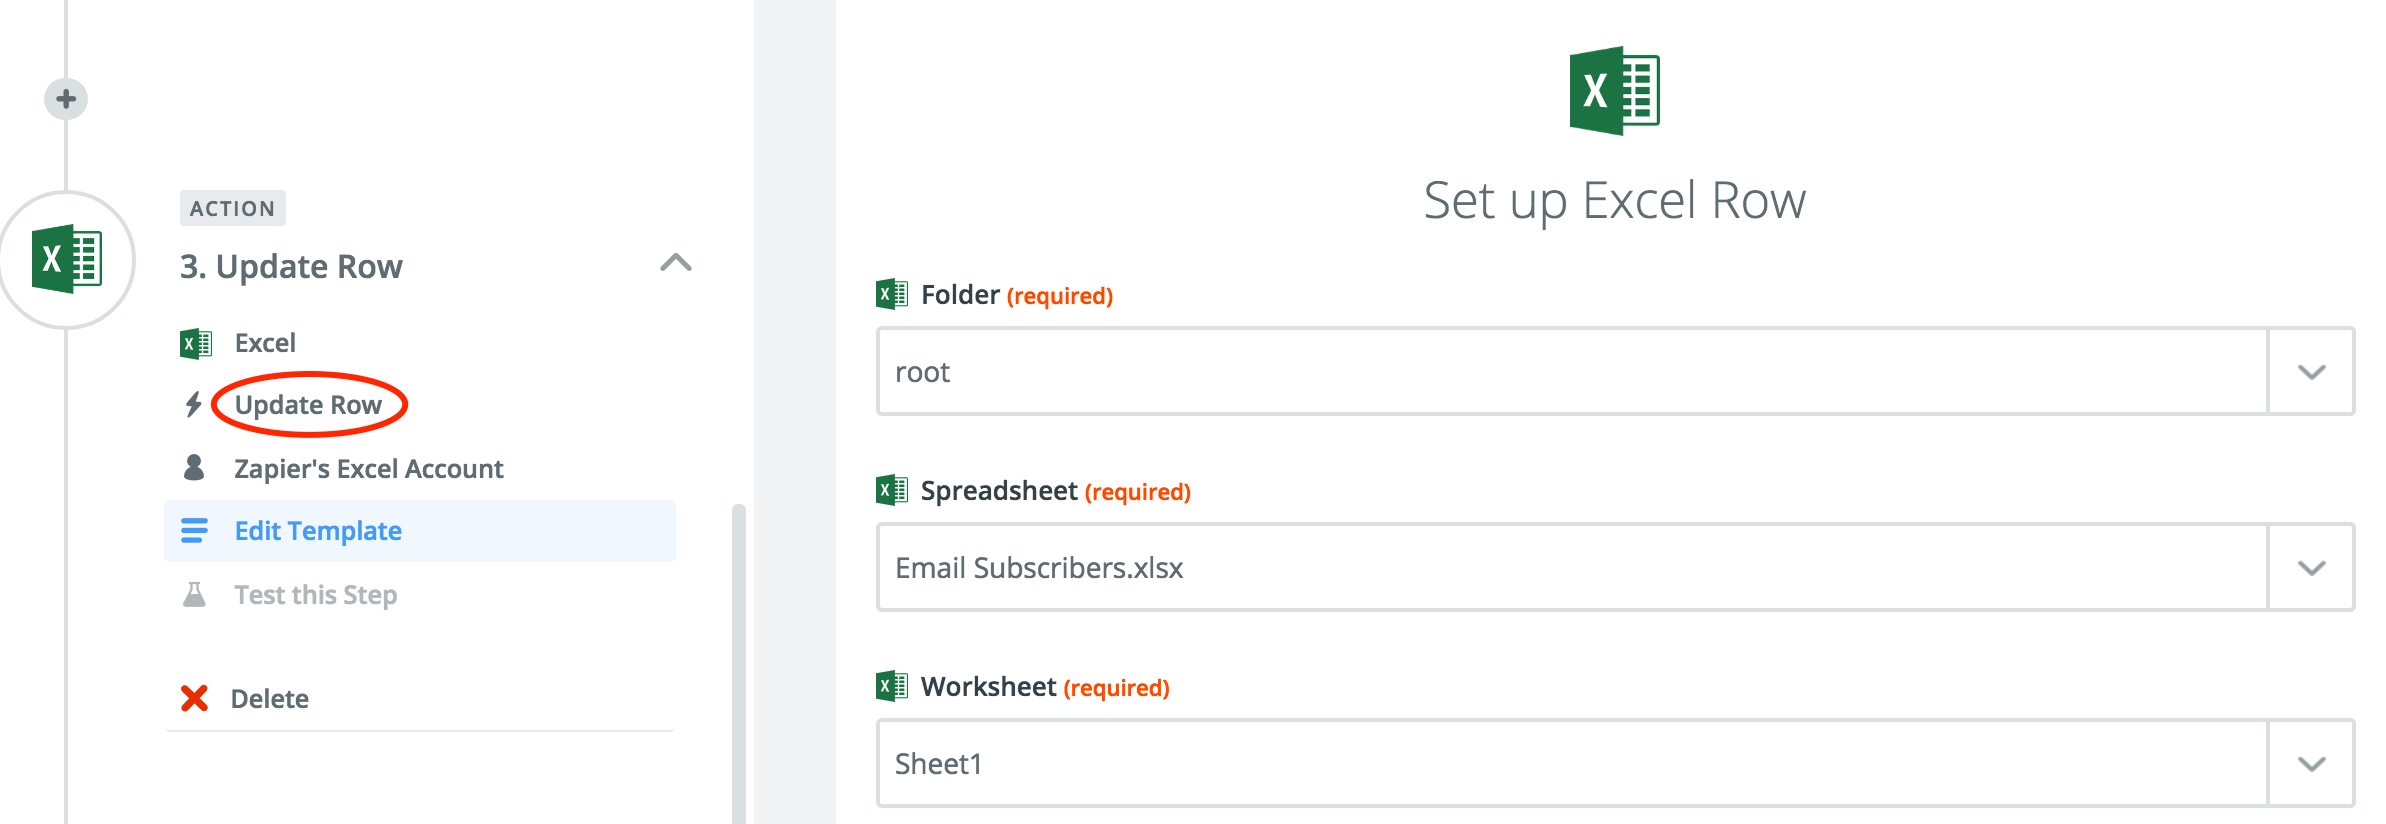
For this next step, you’ll want to again, choose Excel as your app, but this time, choose "Update Row" as the action. In this step, you’ll want to choose the same Folder, Spreadsheet, and Worksheet as your previous step.
When you get to the “Row ID” field, you will want to choose the row number or ID from the list of options returned from your “Find or Create Row” step. This will allow you to dynamically update rows in your spreadsheet because of the previously added search step.
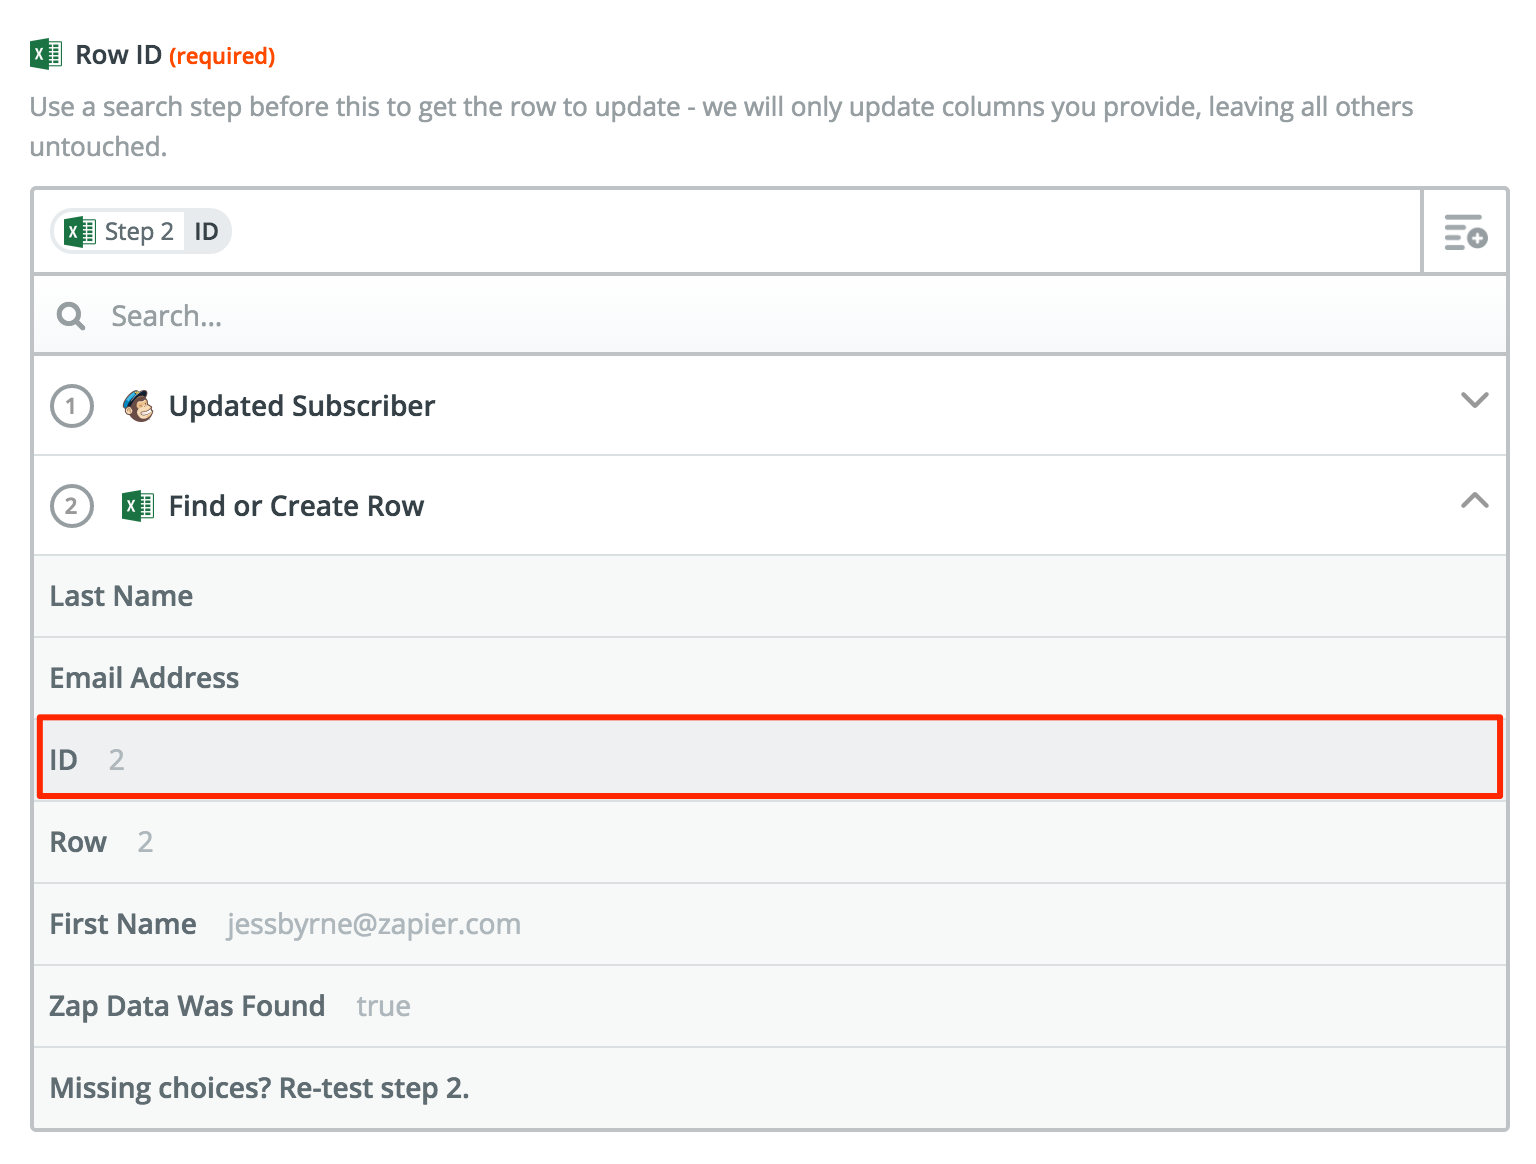
Under that field, you will want to be sure to fill out any and all fields you wanted to update in your spreadsheet, using the data from your trigger step. The last steps here then are to test your Zap, make sure the row was updated in your spreadsheet, and turn on your Zap.