This tutorial explains how to use Zapier to send your PayPal Instant Payment Notifications (IPNs) to more than one destination URL, solving PayPals's single-URL limitation.
This tutorial will only work for legacy version of the PayPal app on Zapier.
IPNs send instant notifications of new PayPal transactions to Zapier through webhooks. You can think of a Webhook as a message sent from one web application to another delivering some kind of data. Zapier uses webhooks to capture new PayPal transactions through PayPal's IPN feature.
PayPal only allows you to set one IPN URL (aka “Webhook URL”). This works out fine if Zapier is the only service you need to send new orders to, but if you use an e-commerce plugin or other service that requires the use of IPN, you’ll find that the IPN URL is already set to that plugin/tool’s URL.
Before going this route, you should check the app directory to see if Zapier supports the e-commerce tool you're currently using. If it does, you may be able to skip this workaround.
If you’d like to use Zapier along with your existing tools, you need to send notifications to more than one URL. Thankfully, Zapier can help you get this done!
We don’t currently use the IPN authentication protocol to verify the webhook received from PayPal. If you wish to do that, you have to implement it in your Zap as a follow-up step.
Setting it up
Using Zapier you can setup any number of PayPal to Webhooks Zaps.
Zapier serves as an amplification mechanism for as many IPN URLs as you need as we can forward your IPNs.
To set this up, follow these steps:
- Create a Zap and choose PayPal as your trigger app. Select “Successful Sale” as the action.
- Copy the Zapier Webhook URL:

- Paste this into your PayPal IPN settings. You can access your PayPal IPN settings here. Make sure to save the old IPN URL that you are currently using at PayPal.

Test the trigger in the Zap editor. - Add a step to your Zap, set it up as follows:
App: Webhooks by Zapier
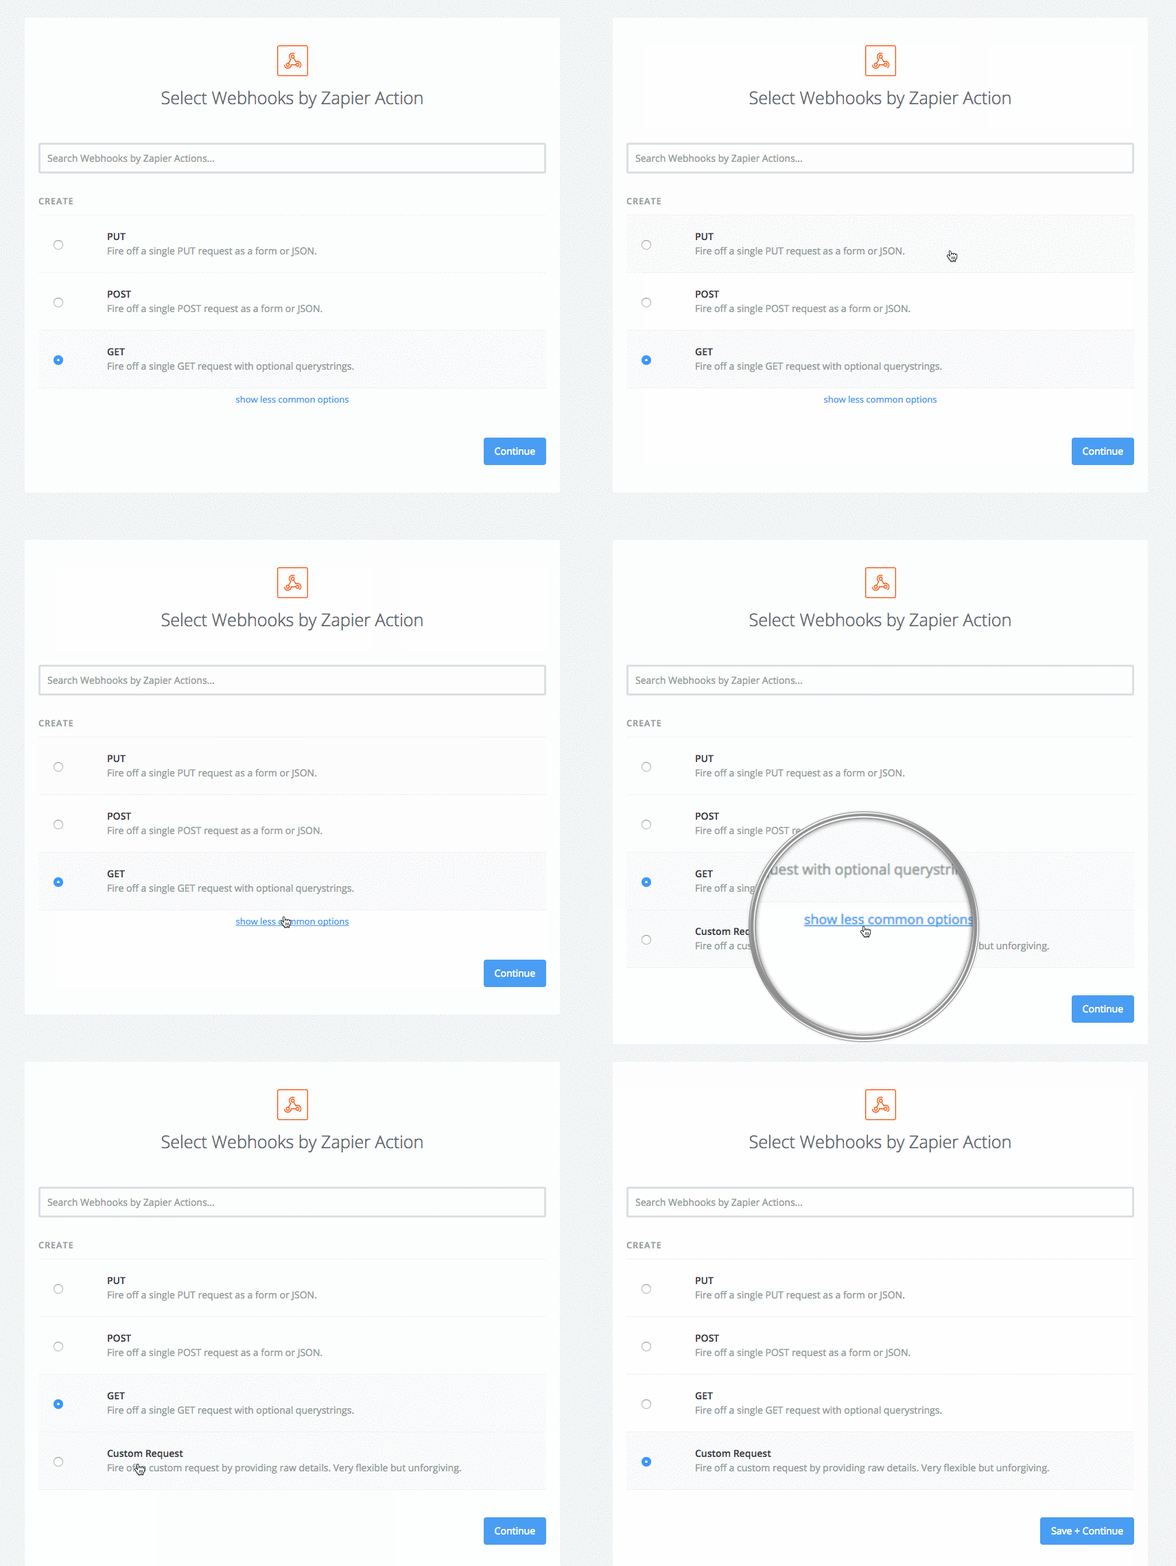
Action: Custom Request (click “show less common options” to reveal that action)
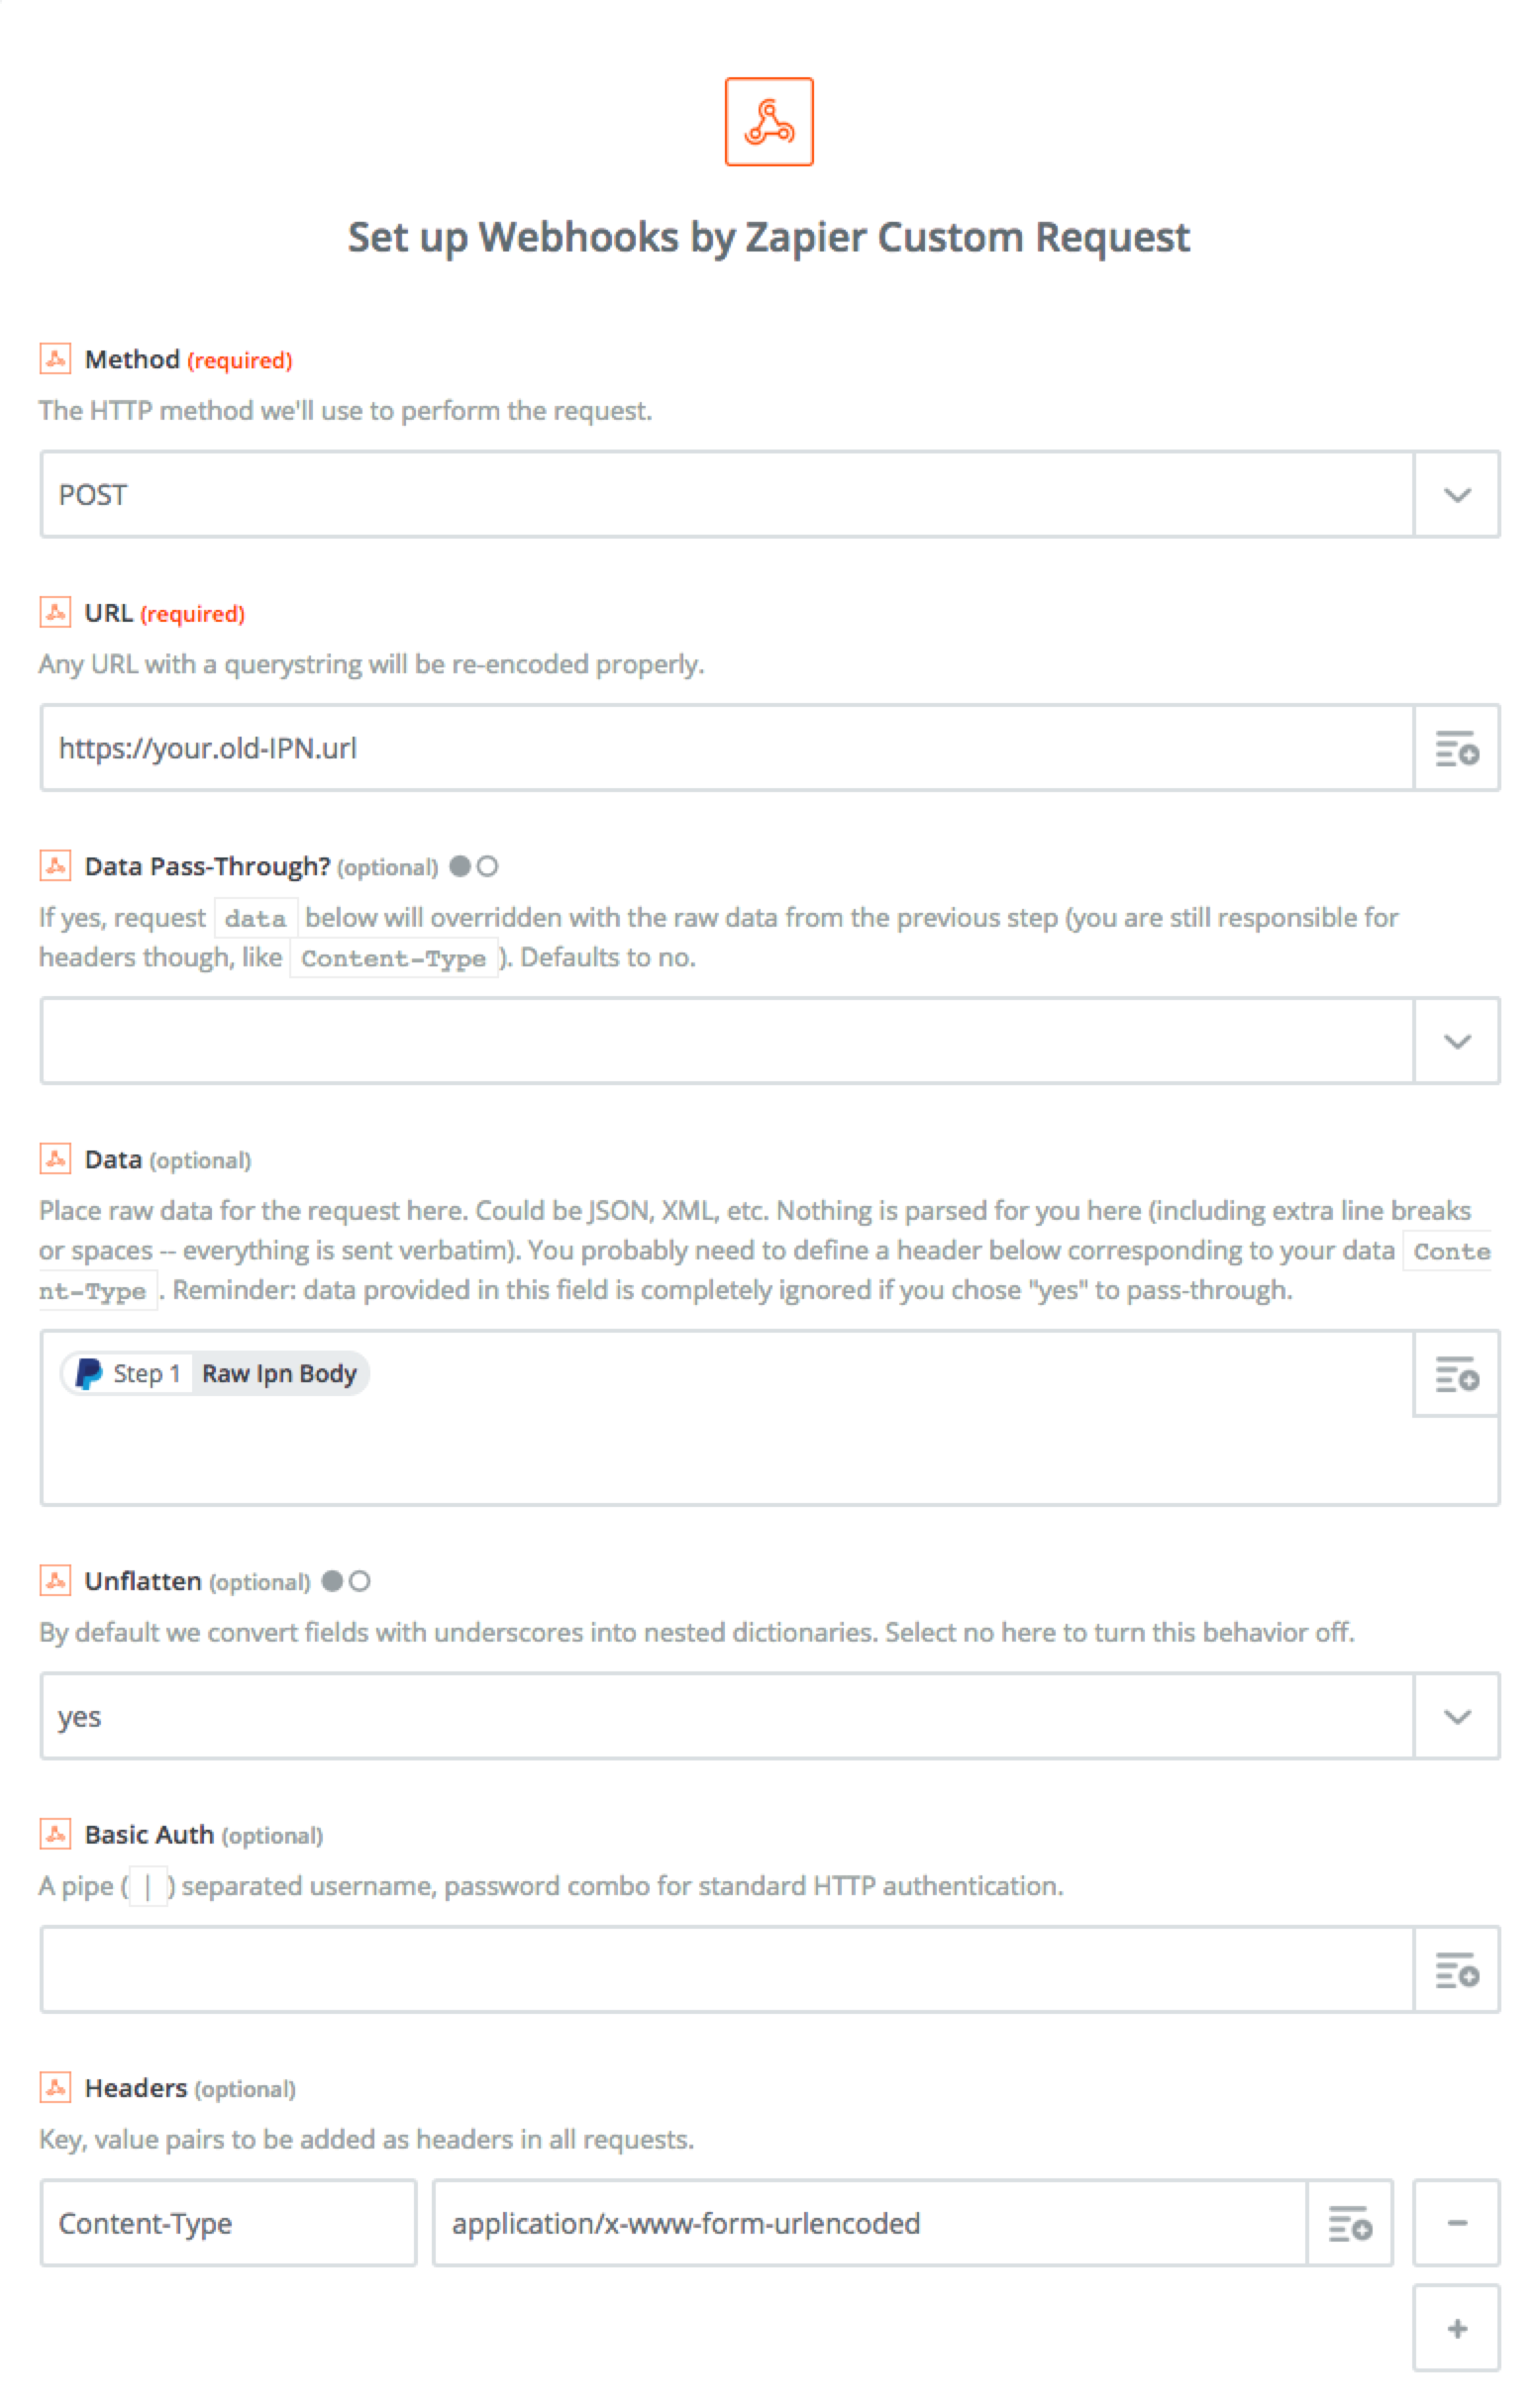
- Set the Method to POST
- Enter your old IPN URL in the URL field
- Insert the "Raw IPN Body” in the Data field.
- Add a header as shown in the screenshot below

Turn on your Zap. Now, your PayPal transactions will get sent to the URL you specified, but you can still set up as many other PayPal Zaps as you want to send that data to other apps as well.
Note: If the plugin/service overrides Zapier's IPN URL in your PayPal account, you'll need to disable it to allow Zapier's URL to persist as the default IPN URL.
Using notification URLs
Also, a common problem is that your notification_url is set at the button level which overrides the IPN you set in your PayPal settings. This is a simple fix! Just choose one of the below:
- Remove the
notification_urlsetting entirely from your button and let the PayPal settings be the default. - Change the
notification_urlin your code to the Zapier IPN hook URL from Step 1 of your Zap.
You can follow the above directions to ensure that each URL gets its notifications.
And that's that! No code needed. Let us know if you need any help setting this up at all.